ResaleWallet Consignor / Client Guide Overview
ResaleWallet Consignor / Client Guide
ResaleWallet is the fastest way to receive your consignment payouts. Instead of waiting for a paper check, your store sends your money straight to your bank account electronically by ACH. You set up your bank details once, and from then on payouts arrive automatically. One ResaleWallet account works across every Liberty store you consign with, so you only set it up a single time.
The account setup is powered by Dwolla. Your store sends the payout, but your bank account information is entered by you in the secure setup pages, not handed to store staff.
Note: ResaleWallet does not use a password. You get into your wallet with a secure, single-use access link that is emailed to you. There is nothing to memorize and nothing to lose.
Before You Begin
Have these ready before you start:
- Access to the email address your store has on file for you.
- Your legal first and last name as shown on the setup form.
- Your bank routing number.
- Your bank account number.
- Whether the account is checking or savings.
- Your own browser session, if you plan to link ResaleWallet to Consignor Center.
The Email You Receive
Everything starts with an email. There are two kinds, depending on whether you have set up ResaleWallet before.
- Your first payout, no account yet: you receive an invitation to set up your ResaleWallet account. It shows the payout that is waiting for you.
- You already have a ResaleWallet account: you receive a notice that a payout is on its way. There is nothing you need to do, the money is already being deposited.
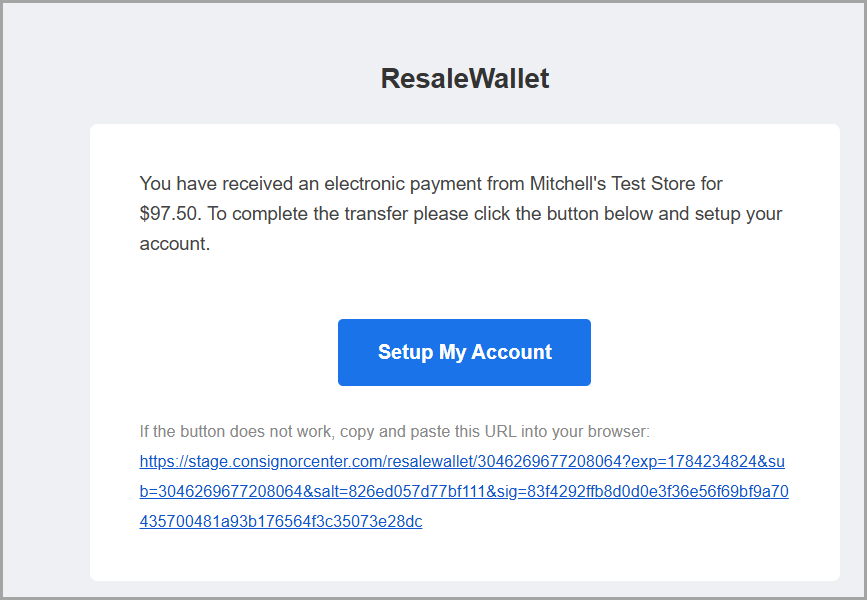 First payout invitation email. The email shows the payout amount and includes Setup My Account to begin setup.
Note: If you have set up ResaleWallet at another Liberty store, you do not need to set it up again. The same account receives payouts from all of your stores.
Open Your Wallet with an Access Link
You open your wallet with a secure access link instead of a password.
- Open the email from your store and click Setup My Account. You are taken straight to your wallet.
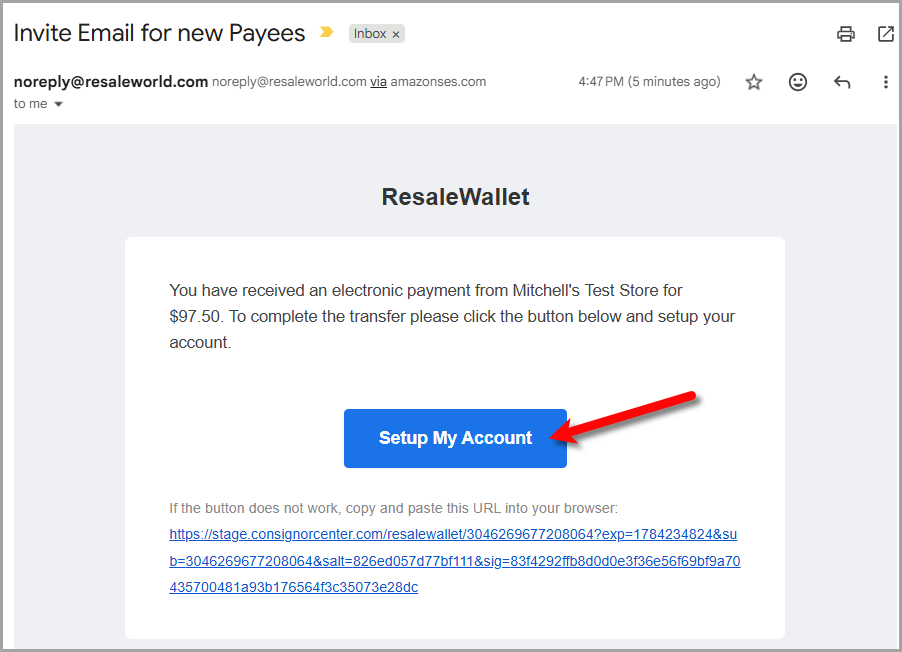 In the invite email, click Setup My Account to open your wallet and continue setup.
 - If you do not have a current link, go to the Request Access page, type your email address, and click Send Link.
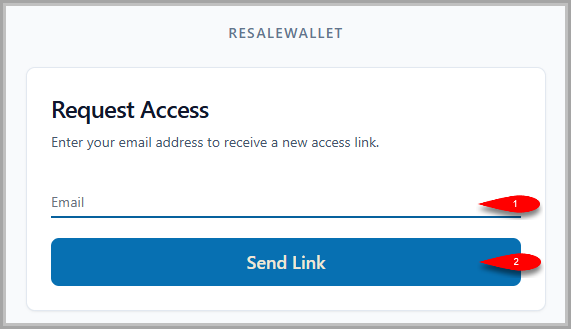 The Request Access page: enter your email address, then click Send Link to receive a new access link.
 - Check your inbox for the new access link. If you do not see it within a few minutes, check your spam or junk folder.
- Click the link in the email to open your wallet.
Note: Access links expire for your security. If your link no longer works, just request a new one from the Request Access page. If you request several in a row, give it a minute, repeated sends can be temporarily rate limited.
Create Your ResaleWallet Account
The first time you open your wallet, you set up your payout account.
- Your email, first name, and last name are already filled in from your store. Check that they are correct.
- Check the box to accept the Terms of Service and the Privacy Policy.
- Click Agree and Continue.
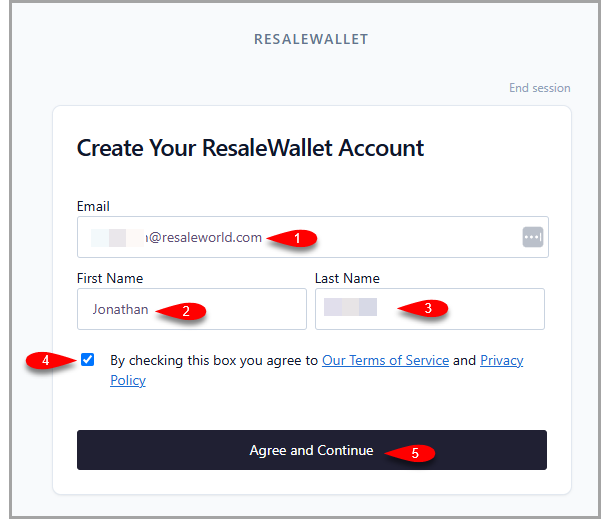 Create Your ResaleWallet Account: confirm your email (1), first name (2), and last name (3), check the Terms and Privacy box (4), then click Agree and Continue (5).
Note: If the page says the email already exists, the same address may already be connected to a ResaleWallet account. Contact your store or Resale World support before trying a different email.
Verify Your Email Address
So that payments can continue, ResaleWallet asks you to confirm your email address one time.
- You receive an email titled Verify your email. Open it and click Verify Email Address.
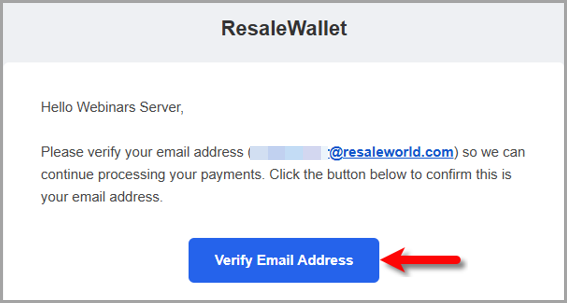 The verification email. Click Verify Email Address to confirm your address.
 - A confirmation page opens. Click Verify my email.
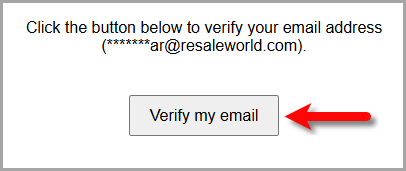 The verification page. Click Verify my email to finish.
 - You see a message that your email is verified. You can close that window.
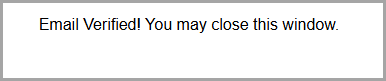 Your email address is now verified.
Note: If the button in the email does not work, the email also contains a link you can copy and paste into your browser.
Add Your Banking Details
Next, tell ResaleWallet where to send your money. You enter your routing and account numbers directly; there is no bank login step.
- Give the account a nickname, for example Checking.
- Choose the account type, checking or savings.
- Enter your bank routing number.
- Enter your account number.
- Click Submit.
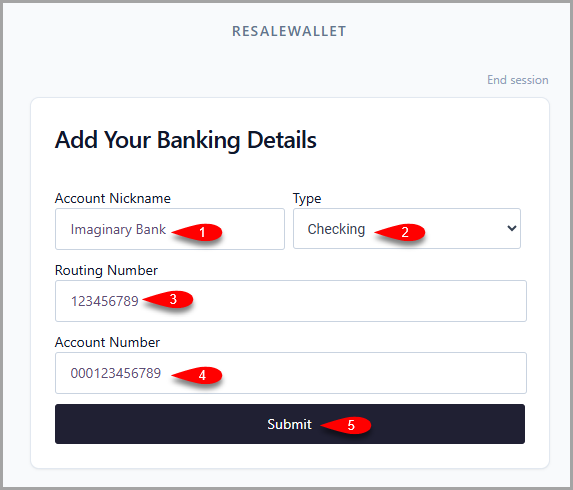 Add Your Banking Details form: enter an account nickname (1), choose checking or savings (2), enter the routing number (3), enter the account number (4), then click Submit (5).
 - When the account is accepted, you see a success message.
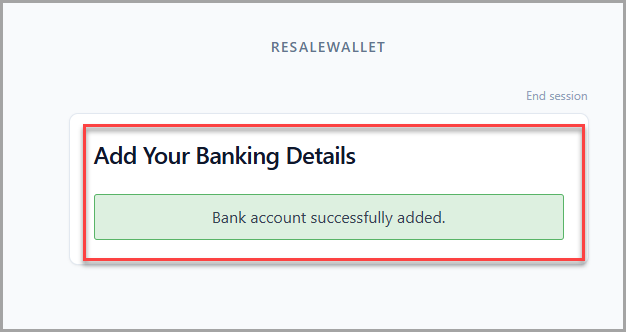 Success message confirming that the bank account was added.
Your Banking Details
Once your account is verified, your wallet shows that it is ready to receive payments.
- Each bank you add appears as a card showing its nickname and bank name.
- Your default account has a green border and a Default badge. Payouts go to the default account.
- To use a different account, click Set as default on that card.
- To add another bank, click + Add another account and repeat the banking steps.
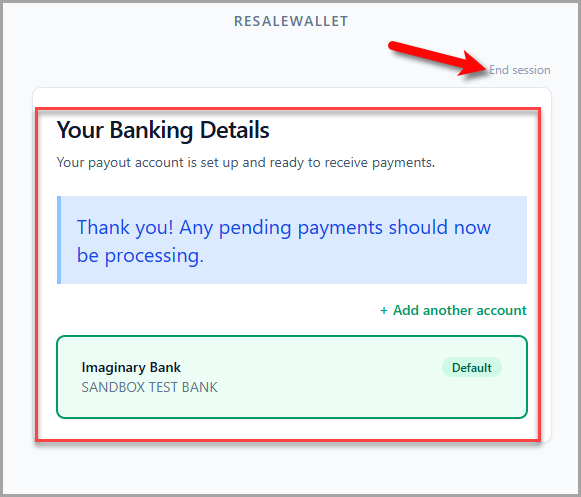 Your Banking Details page. The wallet confirms pending payments should now process, shows the default bank account, and includes End session at the top right.
How You Get Paid
After your account is set up, payouts are automatic. There is no separate accept step for each payout. You do not have to sign in or accept anything; the money is simply deposited into your bank. Each payout comes with an email showing the amount. A $2.50 service fee is deducted from each payout, and the amount is shown to you before the payout is sent.
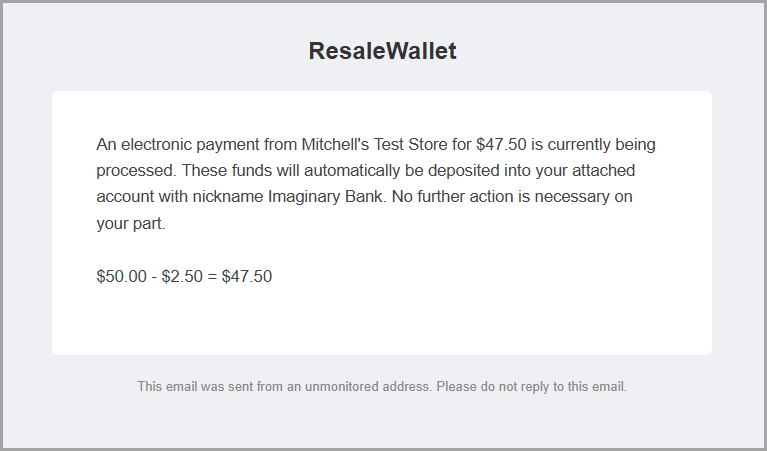 The email you receive when a payout is on the way. The service fee is shown, for example 15.00 minus 2.50 equals 12.50.
Note: Contact your store if a payout amount does not match what you expected.
Manage ResaleWallet from Consignor Center
If you use Consignor Center, you can link your ResaleWallet account to your profile so it is easy to return to.
- When you open your wallet while you are signed in to Consignor Center, a banner offers to link the two.
- Click Link this ResaleWallet account in the banner, or open the Link Your Account page.
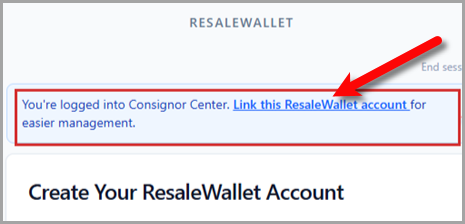 When you are signed in to Consignor Center, the Create Account screen shows a banner to link your wallet.
 - Click Link to my Consignor Center account.
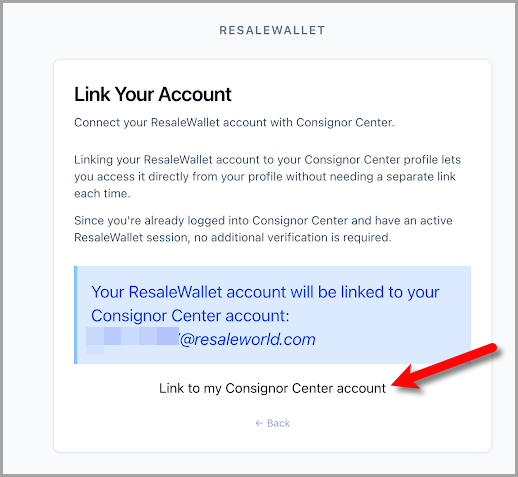 The Link Your Account page. Click Link to my Consignor Center account to connect the two.
 - Once linked, your account shows as found, and you can open your wallet from your profile any time.
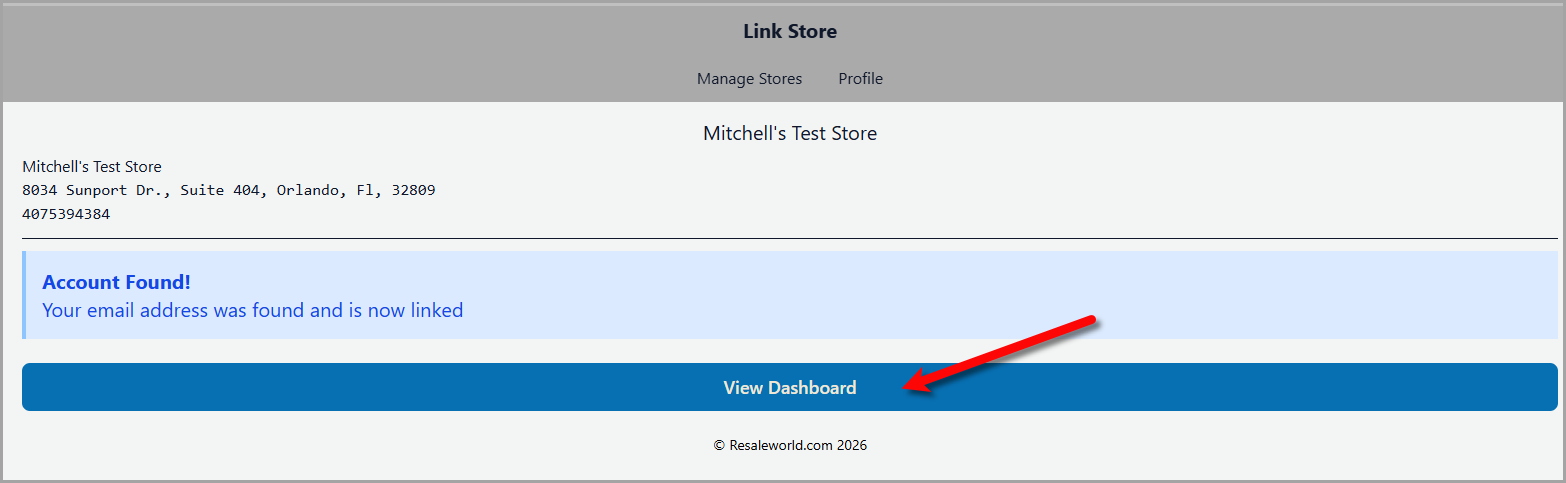 After linking, your profile confirms the account was found and offers View Dashboard to open your wallet.
Note: Linking is only a shortcut to your wallet. Your bank details and payouts are not changed by linking. Because the link attaches to the Consignor Center account that is already signed in, always link from your own browser.
Troubleshooting
I did not receive the email
- Check your spam and junk folders.
- Confirm your store has your correct email address.
- Request a new access link from the Request Access page.
- Wait a minute before requesting again; repeated sends can be rate limited.
The link is expired
- Use the Request Access page to send a new link.
- Always open the newest email link, not an older one.
My bank was not accepted
- Confirm the routing number and the account number.
- Confirm the account type, checking or savings.
- Use an account that supports ACH.
- Contact your store if the page keeps showing an error.
I linked to the wrong Consignor Center account
- Stop using the linked account right away.
- Contact your store or Resale World support.
- Give them the email on your ResaleWallet account and the Consignor Center account that was linked by mistake.
My payout is still pending
- Confirm your ResaleWallet account was created and your bank was added.
- Check whether a micro deposit still needs to be confirmed.
- Contact your store if the payout stays pending after setup is complete.
Privacy and Security Notes
- Store staff should never ask you to send your full bank account details by regular email. Always enter banking information on the ResaleWallet setup page.
- Do not share your access link with anyone else.
- Use your own browser session when linking to Consignor Center.
- Contact your store if an email or link looks suspicious.
Ending Your Session
When you are done, click End session at the top of any wallet page. For your security this signs you out of every ResaleWallet account in that browser. To return later, request a new access link.
Need Help
Contact your store, or Resale World support at 1-800-785-4800, or submit a ticket through your support widget in the Liberty Inventory Module.
You can also submit a ticket through the support ticket portal at https://my.resaleworld.com.
You can visit the following link for more information: Resaleworld Contact Information
Next Article In Section
Click the following link to move to the next article in this section:
Before You Begin