Citizen CT-S310ii Receipt Printer
- There are a few proactive things you can do to ensure a problem free printer installation. These situations can cause inconsistent power issues with any printer which may cause windows to see the printer as being offline.
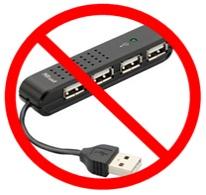
Avoid USB Hubs. A mouse, keyboard, and scanner all work well on USB hubs but when it comes to printers it’s not a good idea. Keep in mind that the amount of voltage traveling though the USB port is split between all devices plugged into the hub.
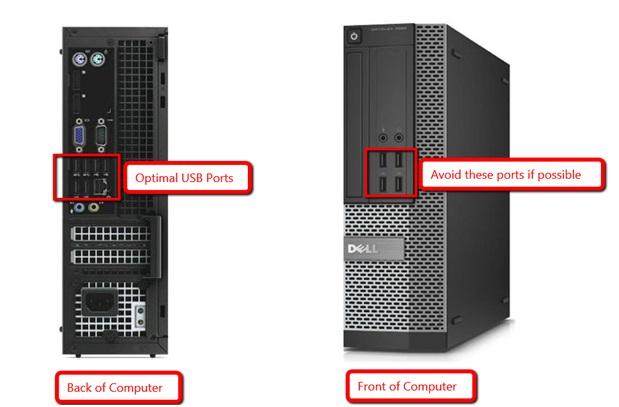
- Try plugging the printer in the back of the computer instead of the front. In our testing plugging a printer into the back of a computer has fewer issues than the front.
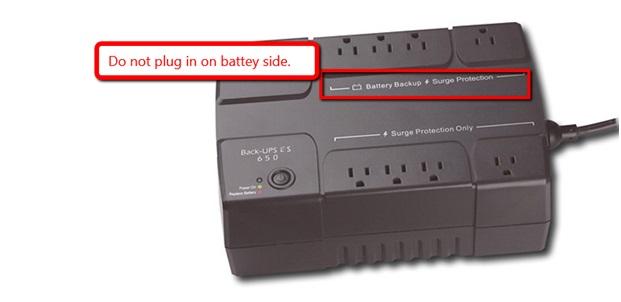
- Avoid using the battery side of a battery backup for printers; however the surge protection side should be fine.
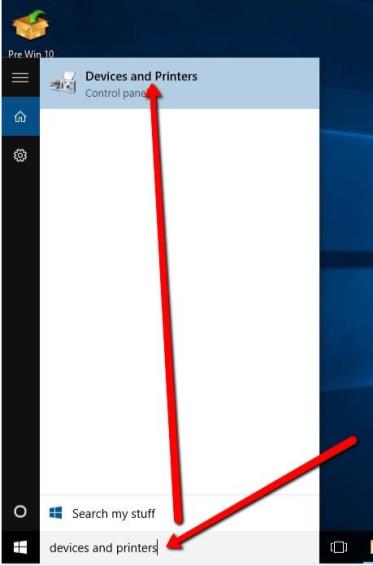
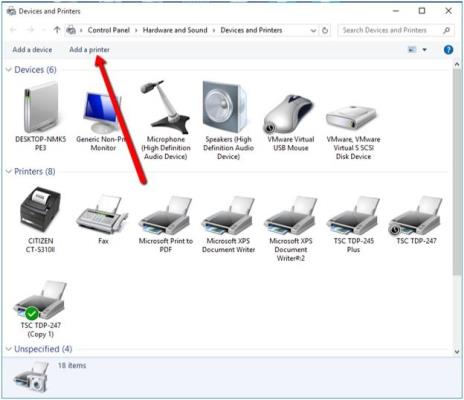
- Search for “Devices and Printers” and choose the first option.
- Click “Add a printer”.
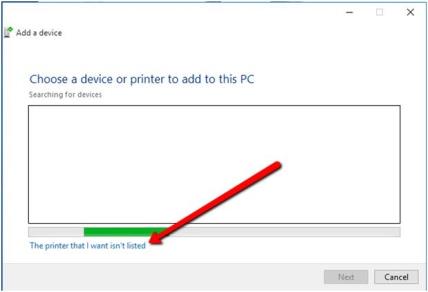
- Click “The printer that I want isn’t not listed”.
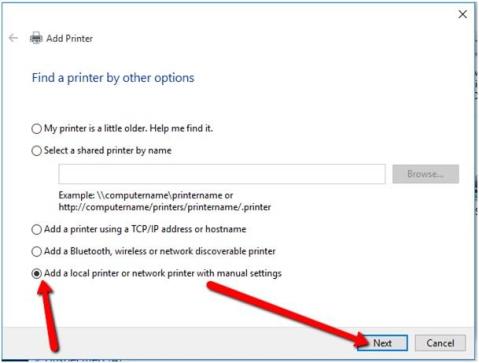
- Select “Add a local printer”, then click Next.
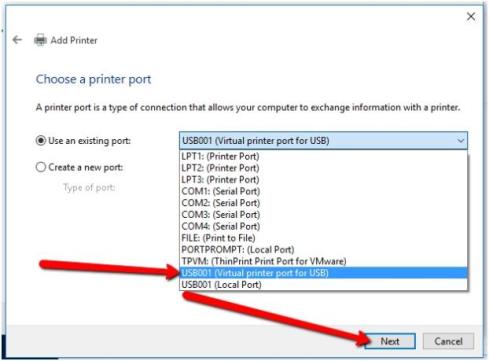
- Next you will need to specify a USB port. In our testing we have found that the highest USB port (in this case USB001) is normally the correct option. However, you will be able to change this later if it is not. After choosing then click Next.
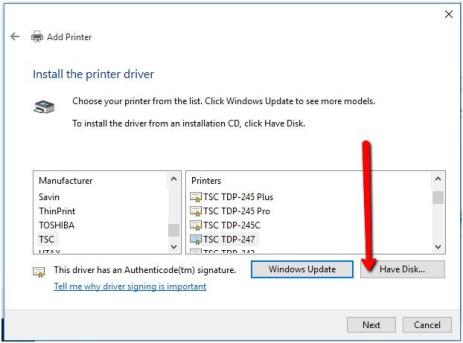
- Click “Have Disk”.
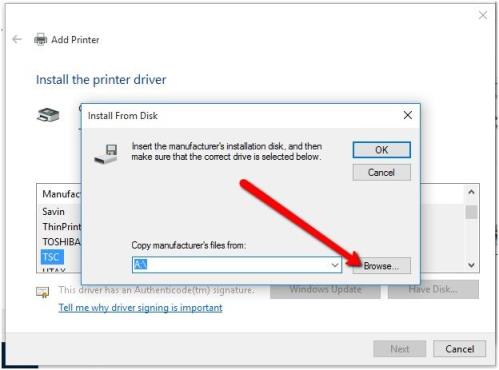
- Click Browse.
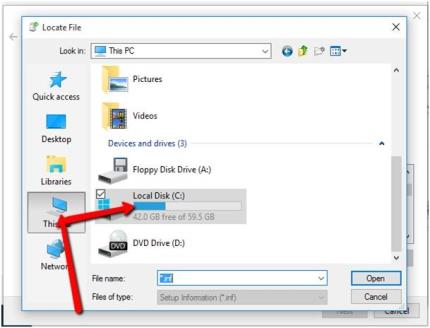
- Click on “This PC”, and then “Local Disk C:\”.
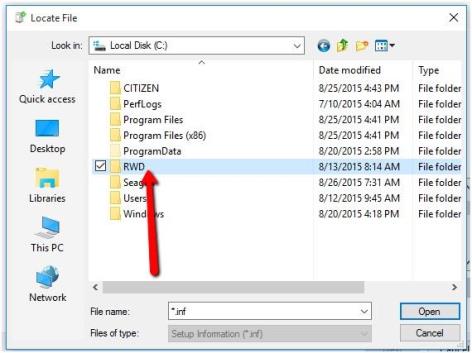
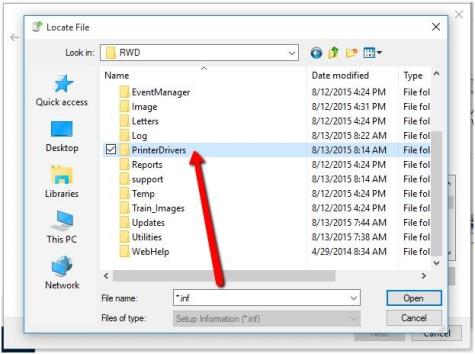
- Choose the RWD folder.
- Choose the PrinterDrivers folder.
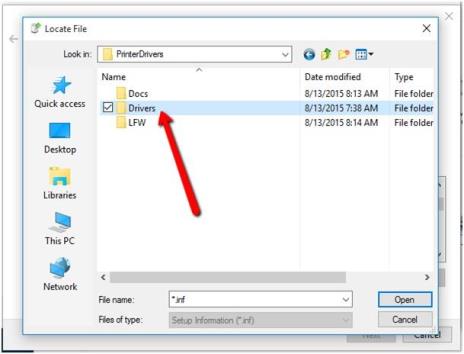
- Choose the Drivers folder.
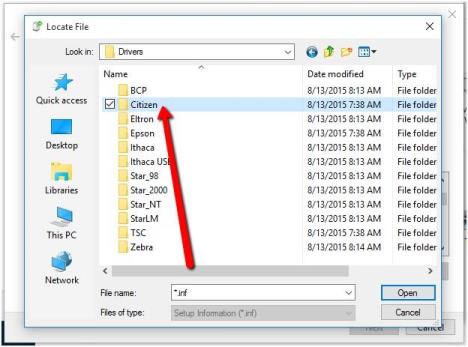
- Choose the Citizen folder.
- Choose the 64bit(x64) folder.
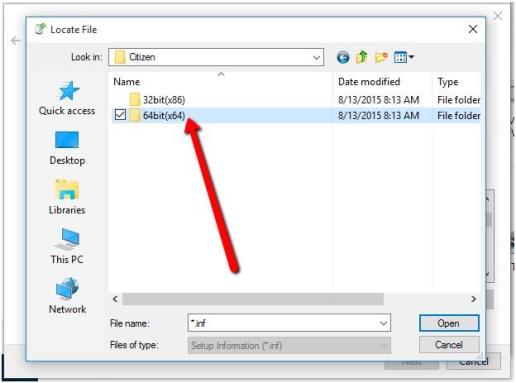
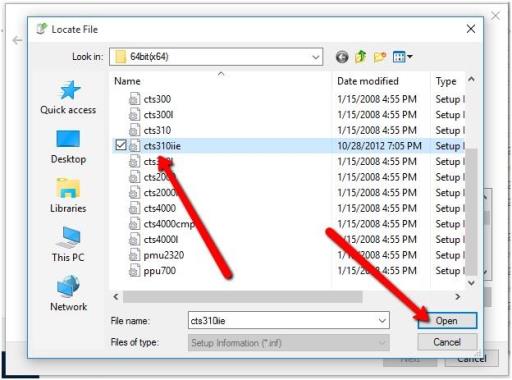
- Now select “cts310IIe” then click “Open”.
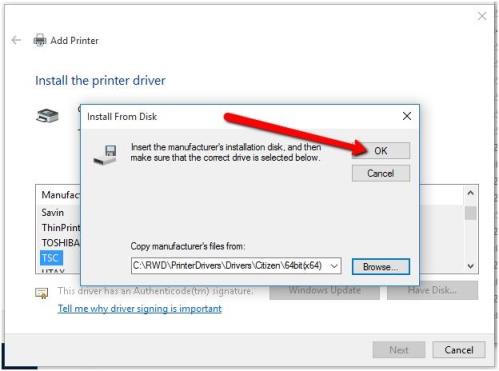
- Click Ok.
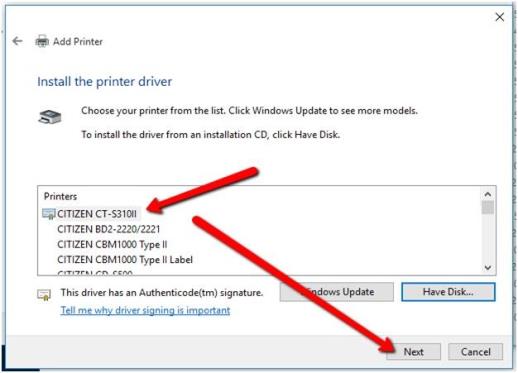
- Scroll until you see “CITIZEN CT-S310II” then click Next.
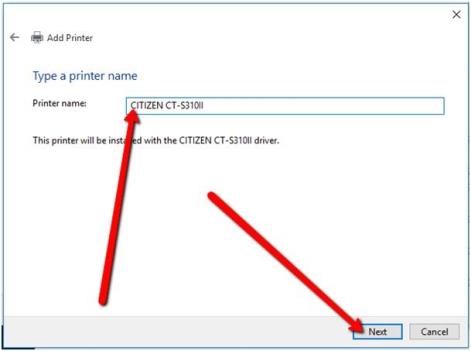
- Keep the name the same and Click Next.
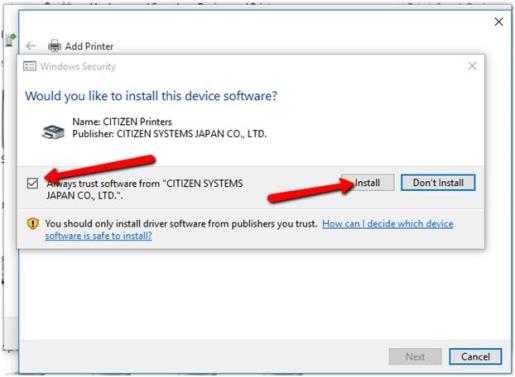
- If windows ask you to allow the program click yes. If you see a window security popup select always trust and Install.
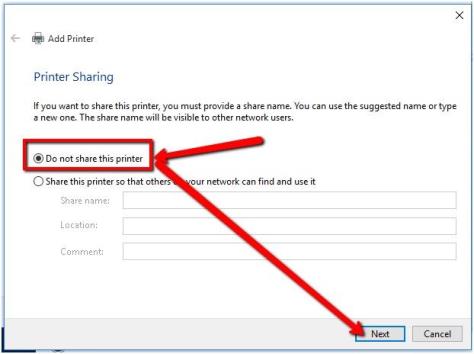
- When asked about printer sharing choose “Do not share this printer” then click Next.
- Do NOT select “Set as default printer”. You can print a test page to see if the printer works, then click “finish”. If a test page prints, you're ready to move on to the Setup in Liberty portion of this guide.


If a test page failed to print, try going into Citizen Printer properties and clicking the Ports tab. You will want to try a different USB port usually the highest available.
Also, check the physical connections.

Setting Up The Citizen Receipt Printer in Liberty
- Launch the Point of Sale module.
- Select More…
- Select Setup.
- Select Print Options.
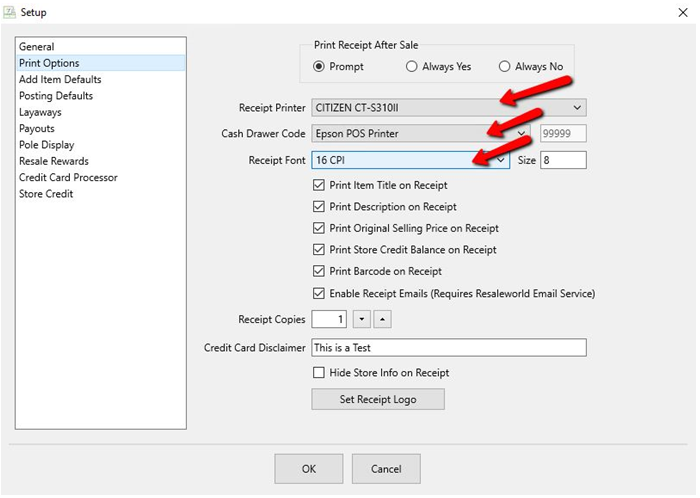
- Select the CITIZEN CT-S310II from the Receipt Printer drop-down menu.
- Select 16 CPI.
- If you are utilizing a cash drawer, select Epson POS Printer for the Cash Drawer Code.

Next Section Navigation Link
Click the following link to see a list of articles for the next section:
Printing In Liberty
Related Topics
Citizen CT-S310ii Receipt Printer RP80 Receipt Printer How To Recalibrate a TSC Tag Printer Troubleshooting the TSC TDP-247/TDP-245 Plus Tag Printer Troubleshooting the DA210/DA220 Tag Printer TSC DA210 USB Tag Printer TSC DA220 Ethernet Tag Printer TSC TDP-247 USB Tag Printer How to Recalibrate a Zebra Tag Printer Zebra LP2824 Tag Printer Zebra LP2844 Tag Printer