Table of Contents
Using coupons in POS
Here is the video that covers this content:
How To Create And Use A Coupon In The POS
Coupons are a great way to offer discounts on items. Before being able to use a coupon, they must first be set up in the Point Of Sale.
How To Set-up Coupons In Pos
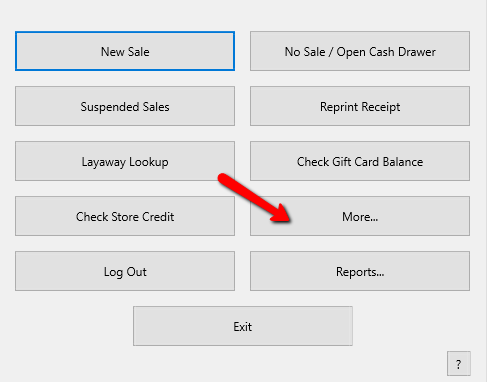
- From the POS Hub, select the More button.
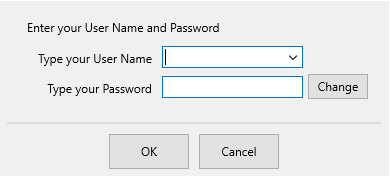
- Login if prompted.
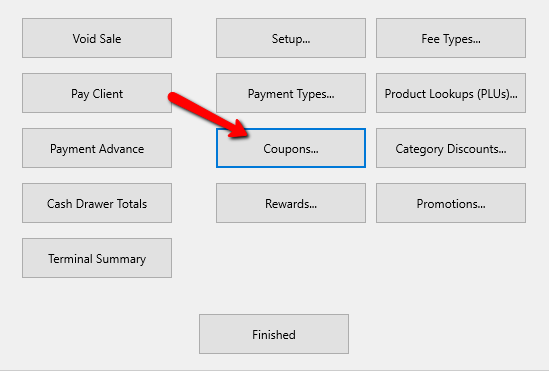
- Select the Coupons button.
The Maintain Coupons dialog box opens.
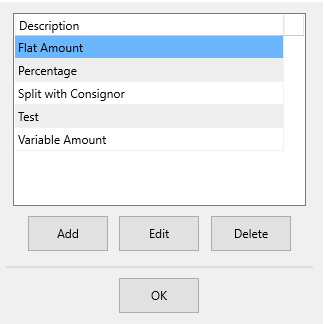
- Highlight and select the Edit button, or select the Add button to open the details of the coupon. Select the Delete button to remove a coupon from the system.
Note: You can not delete a coupon that has been used for Accounting Purposes.
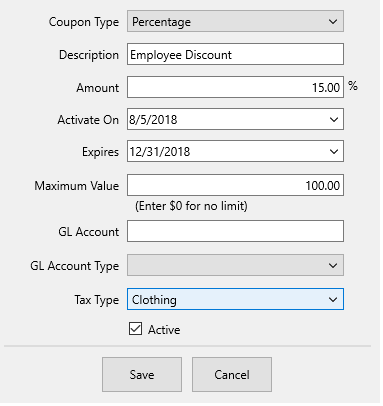
The Coupon Details dialog box will open.
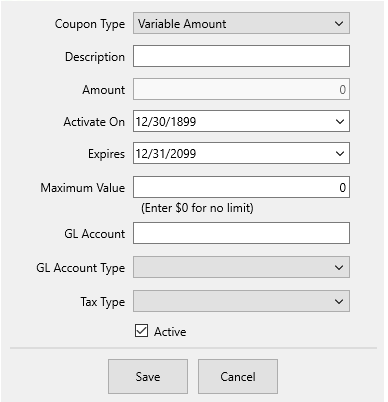
- Coupon Type : This drop down allows you to select the type of coupon you are creating:
- Variable Amount : User must enter the dollar amount of the coupon each time it is redeemed.
- Flat Amount : Coupon is for a specific amount, such as $1.00, $2.00, $3.00 etc.
- Percentage : Coupon is for specified percentage off the purchase, such as 5%, 10%, 15% etc.
- Split With Consignor : The consignor split is calculated on the discounted selling price of the item, rather than on the full selling price of the item.
Note: With the Split with consignor coupon type, both the store and the consignor will take their price code split percentage off of the new discounted price.
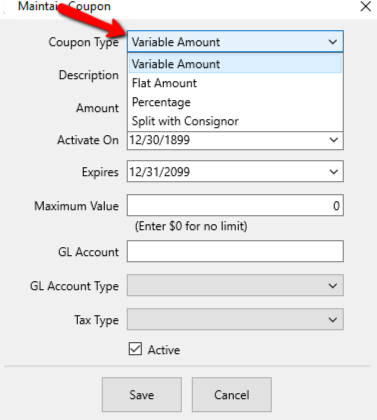
- Description : Enter a description for the coupon you are creating.
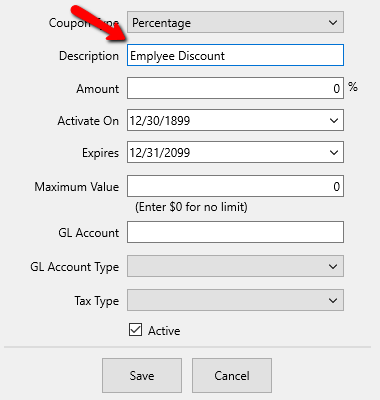
- Amount : Use the amount field to enter the value of the coupon, based on the selected Coupon Type.
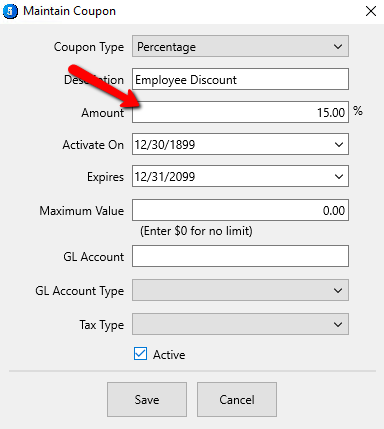
- Active On : Use the Activate On field to specify a date when this coupon will be available for use.
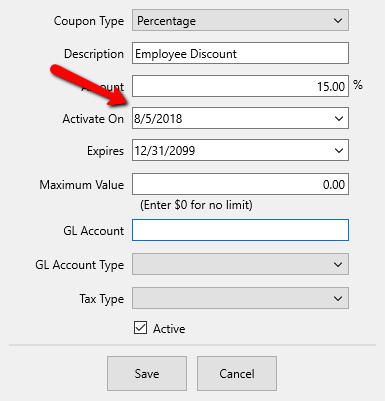
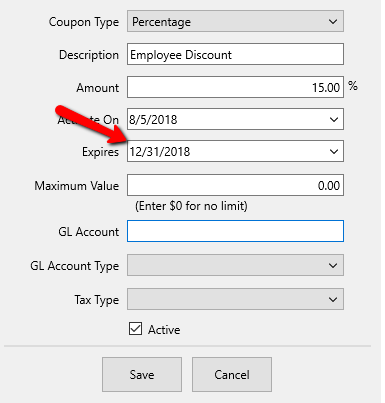
- Expires : Use the Expires field to select the date on which this coupon will expire.
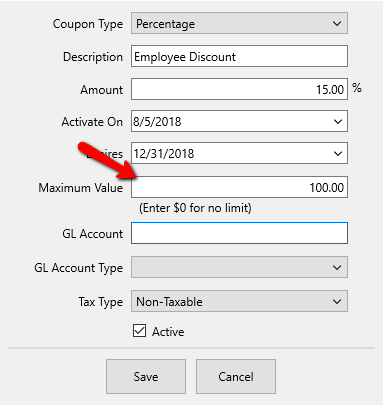
- Maximum Value : The Maximum Value is the maximum, amount the coupon will take off the sale.
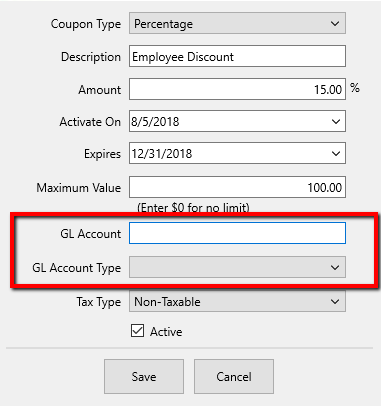
- GL Account and GL Account Type : These are used when exporting data to QB. See Quickbooks Link for more details.
- Tax Type : Use the Tax Type drop down to assign a specific tax type to the coupon.
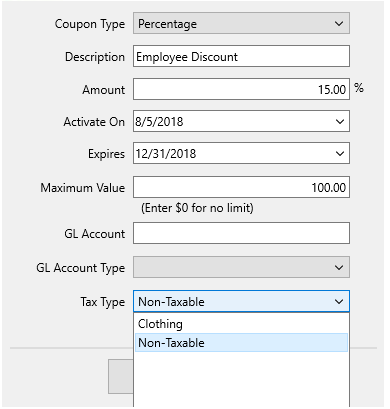
- Active (Check Box) : Use the Active check box to indicate that this coupon is now active in the system. If this field is not checked, the coupon cannot be used.
- Click Save button to save your changes and exit.


Apply a Variable Amount Coupon
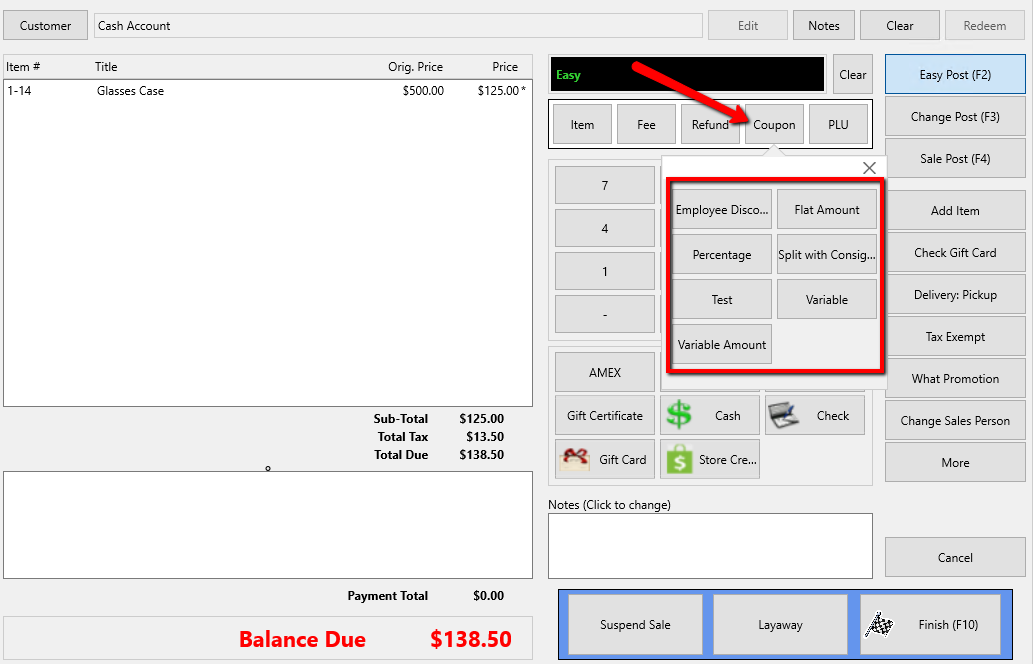
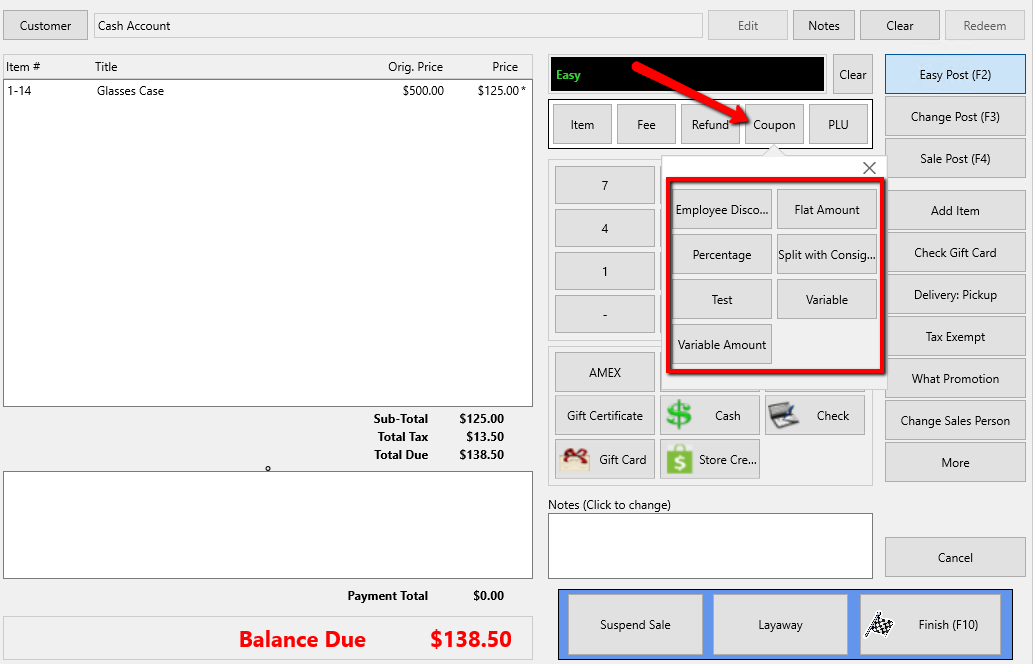
- Select the Coupon button. A drop down with available coupons appears.
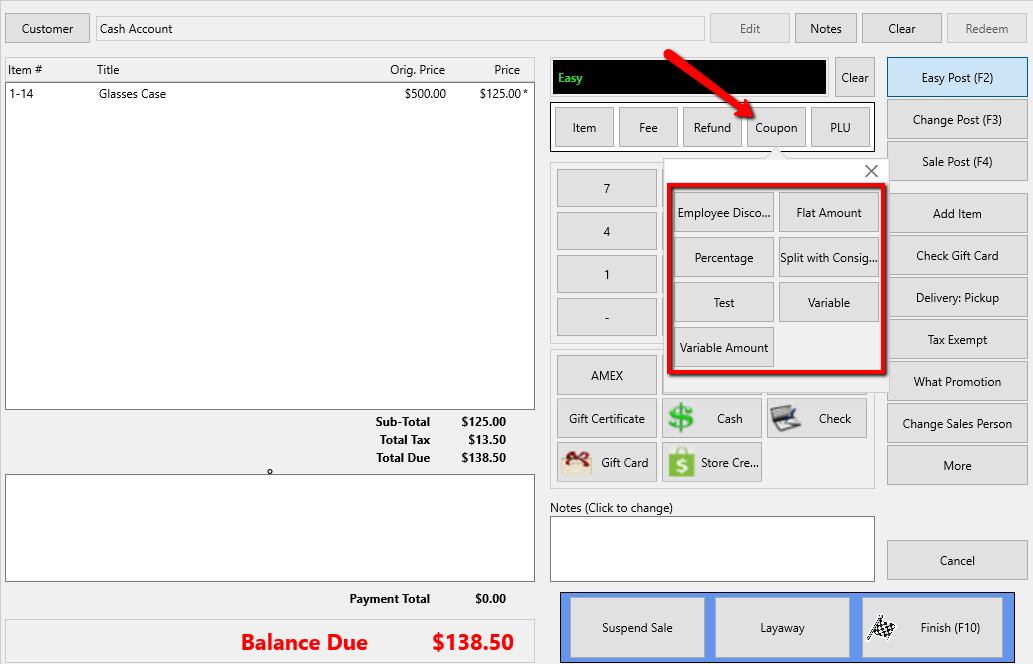
- Select the Variable Amount Coupon.
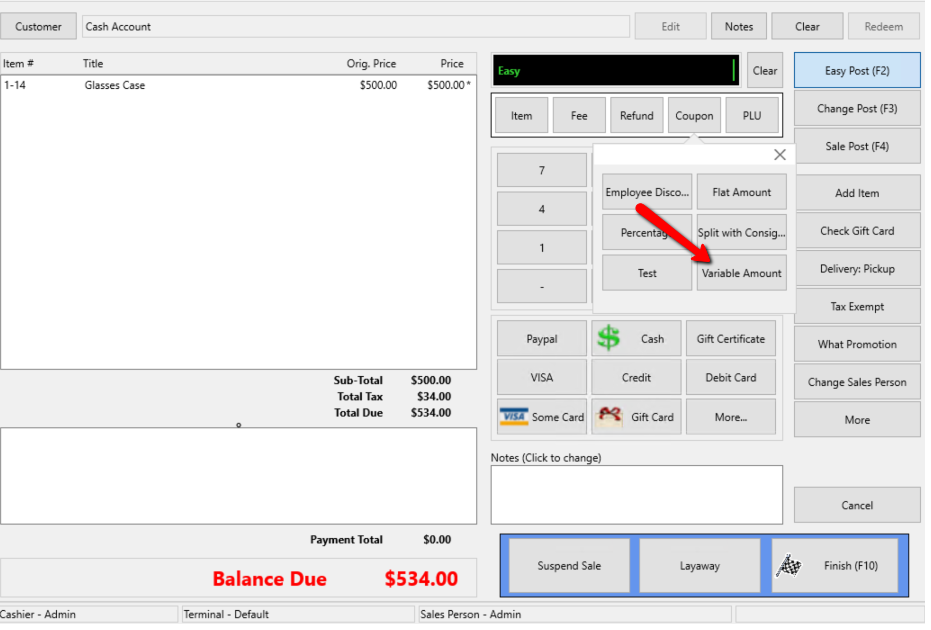
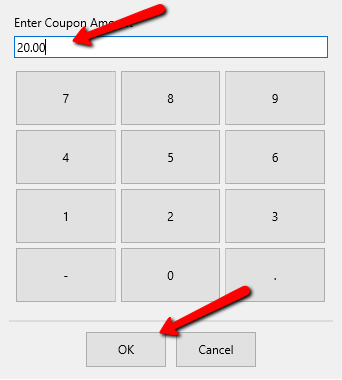
- Enter the coupon amount to be applied to the sale., then press the OK button at the bottom.
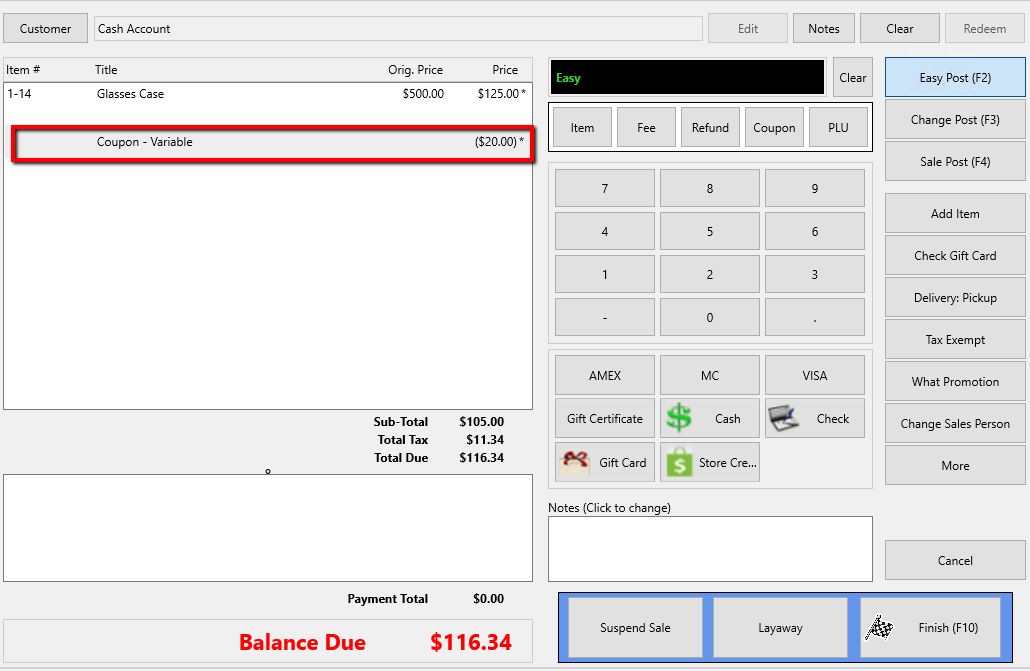
- The coupon is applied to the sale and the amount is deducted from the total.
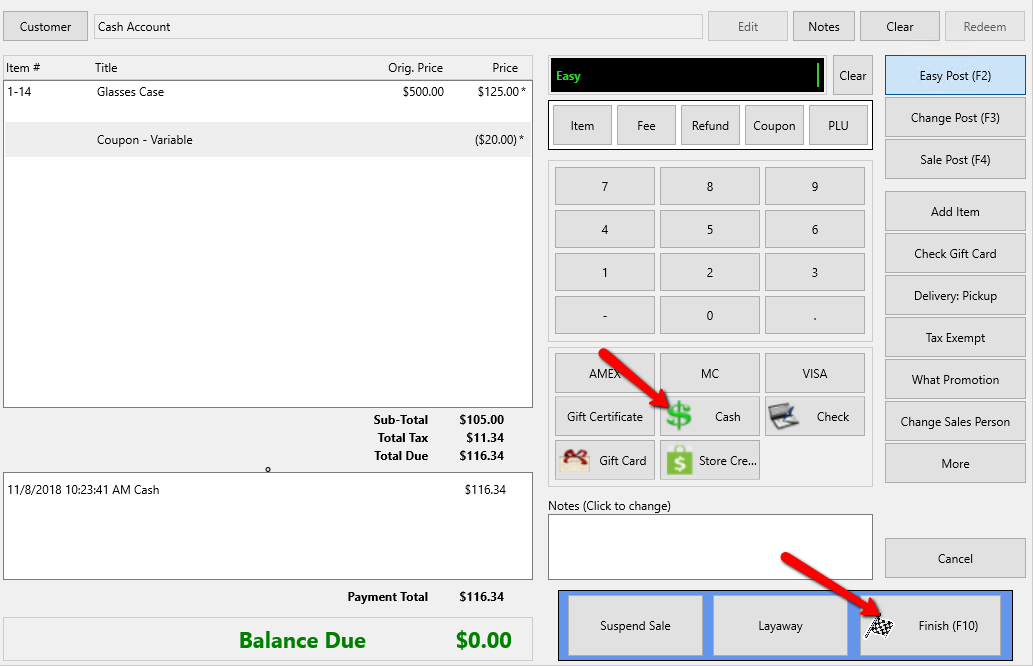
Note: Be sure to enter the items into POS prior to click on the coupon button and selecting your coupon option. - Select the Payment Type and select the Finish button when done.


Apply a Flat Amount Coupon
- Select the Coupon button. A drop down with available coupons appears.
- Select the Flat Amount Coupon.
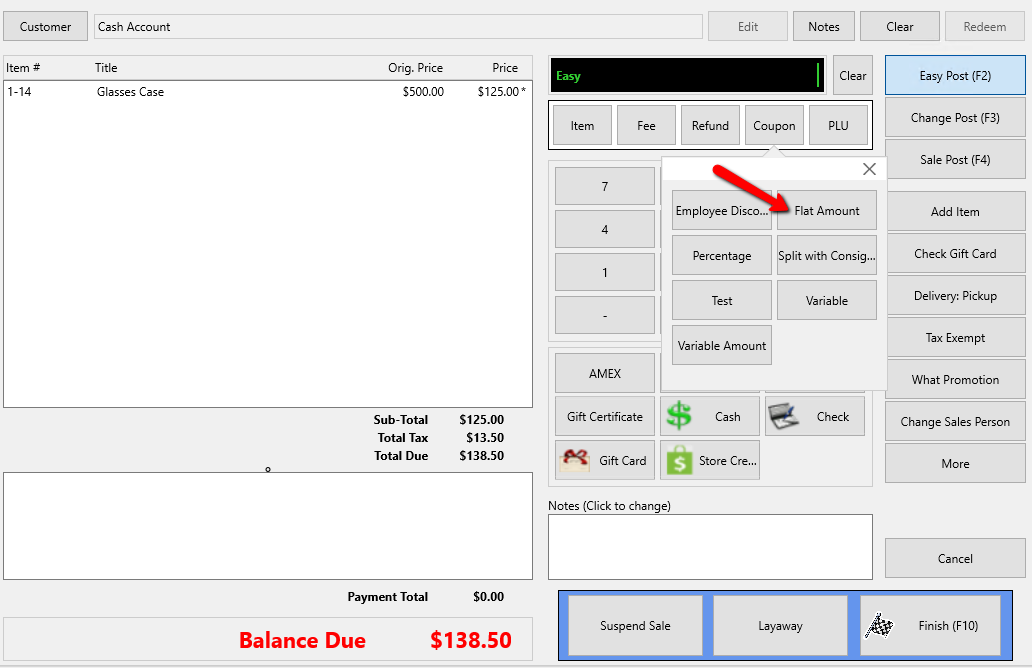
The coupon is automatically added to the sale with the corresponding amount when the coupon was created.
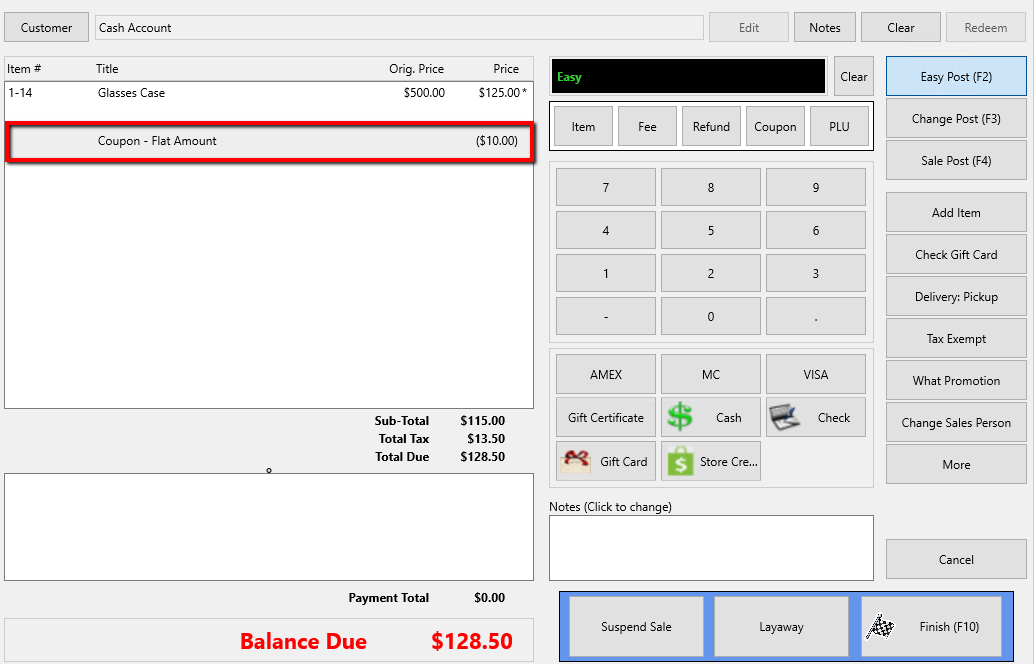
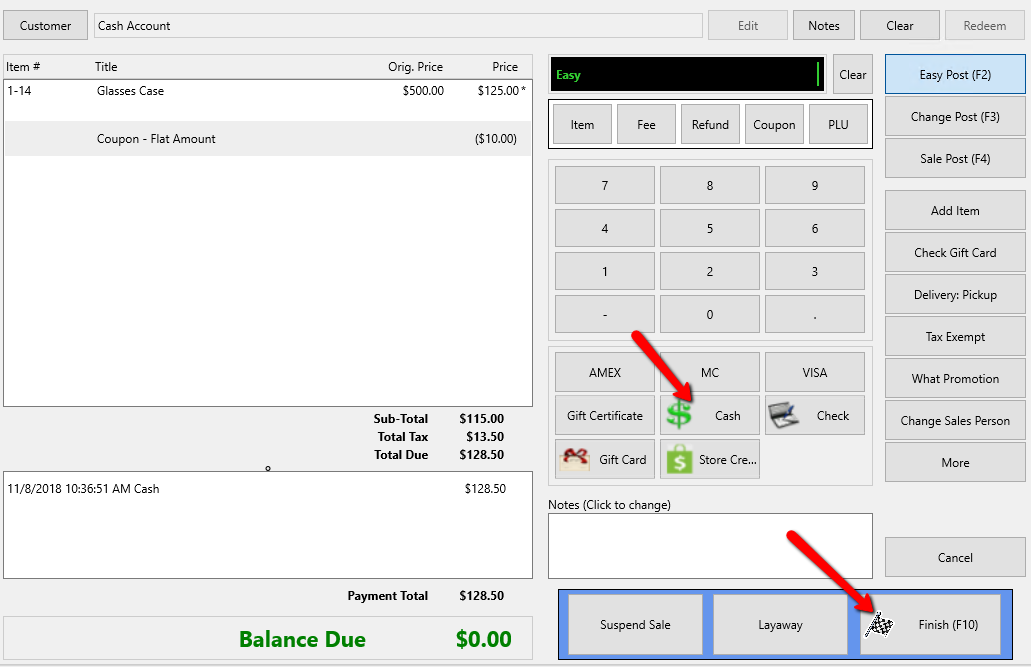
The coupon is applied to the sale and the amount is deducted from the total. - Select the Payment Type and select the Finish button when done.
Apply a Percentage Coupon - Select the Coupon button. A drop down with available coupons appears.
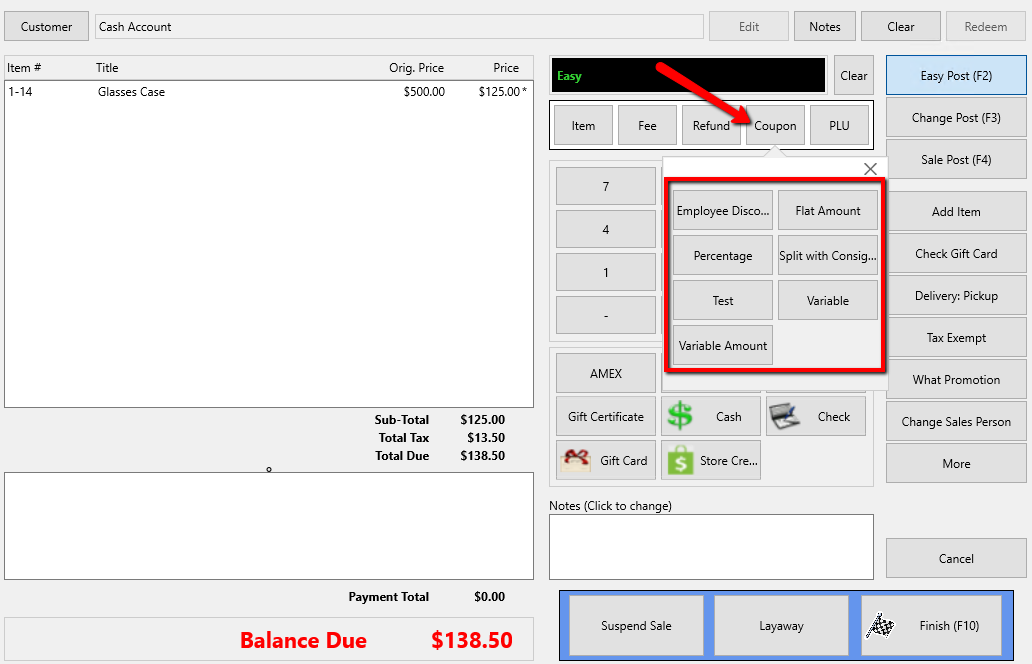
- Select the Percentage Coupon.
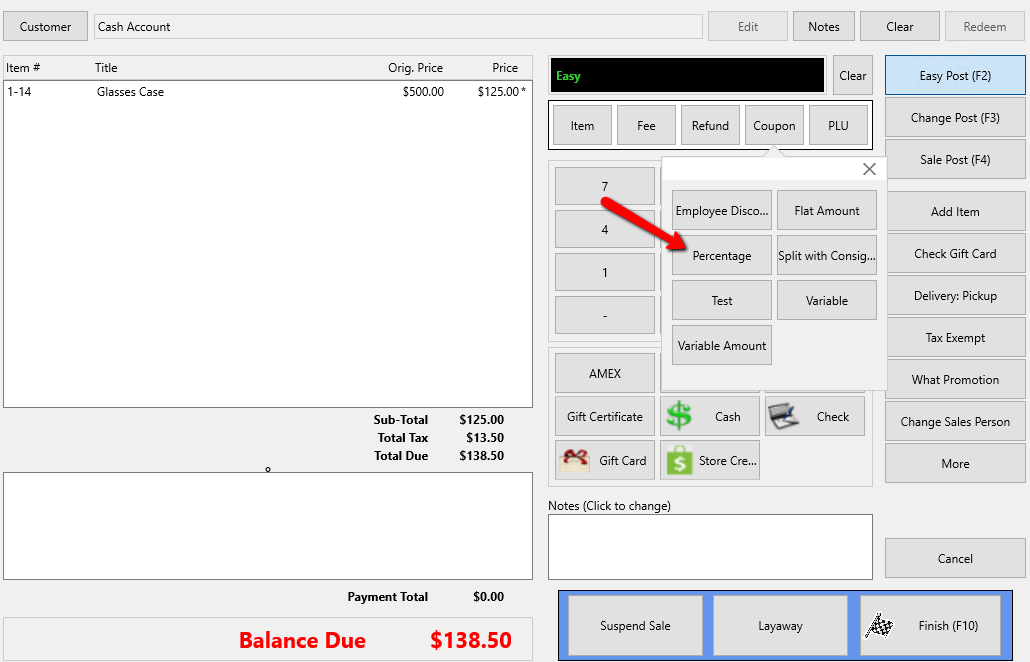
The coupon is automatically added to the sale with the corresponding percentage when the coupon was created.
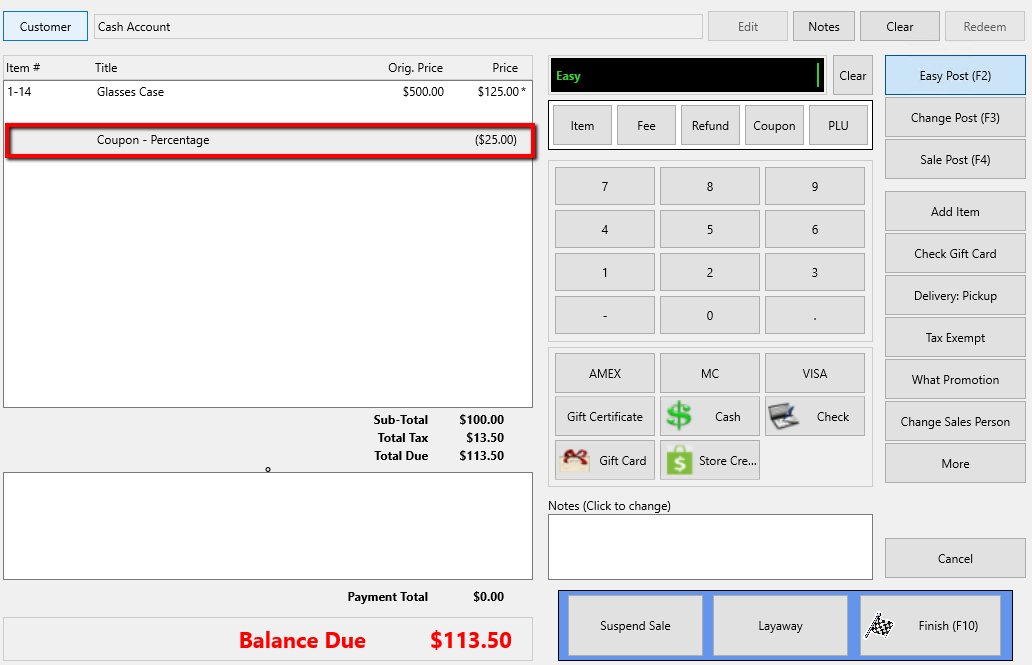
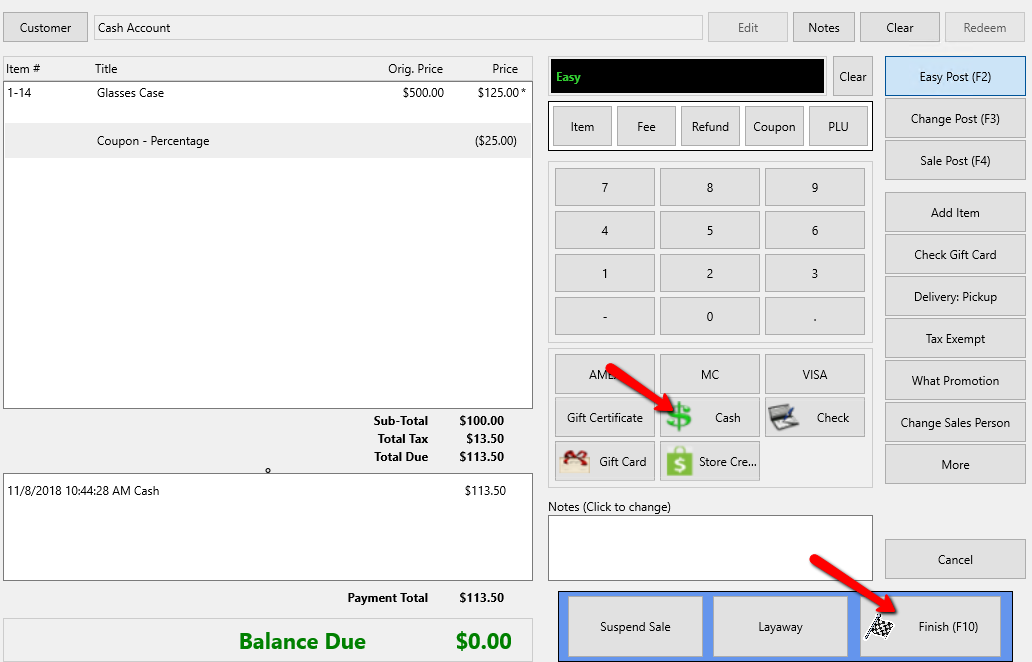
The coupon is applied to the sale and the amount is deducted from the total. - Select the Payment Type and select the Finish button when done.
Apply a Split With Consignor Coupon - Select the Coupon button. A drop down with available coupons appears.
- Select the Split With Consignor Coupon.
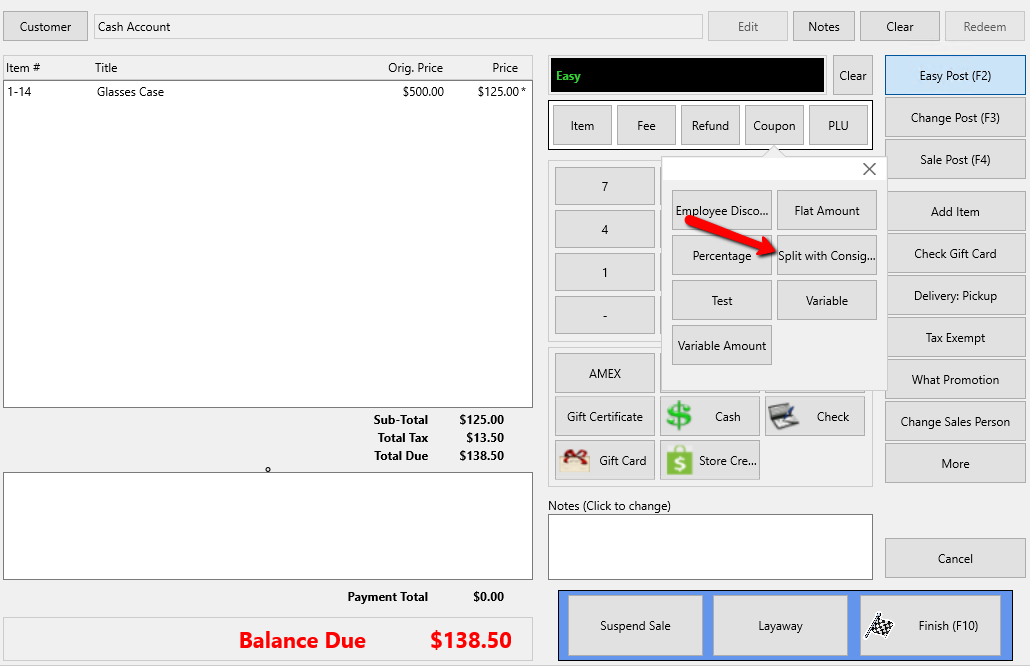
The coupon is automatically added to the sale with the corresponding percentage when the coupon was created.
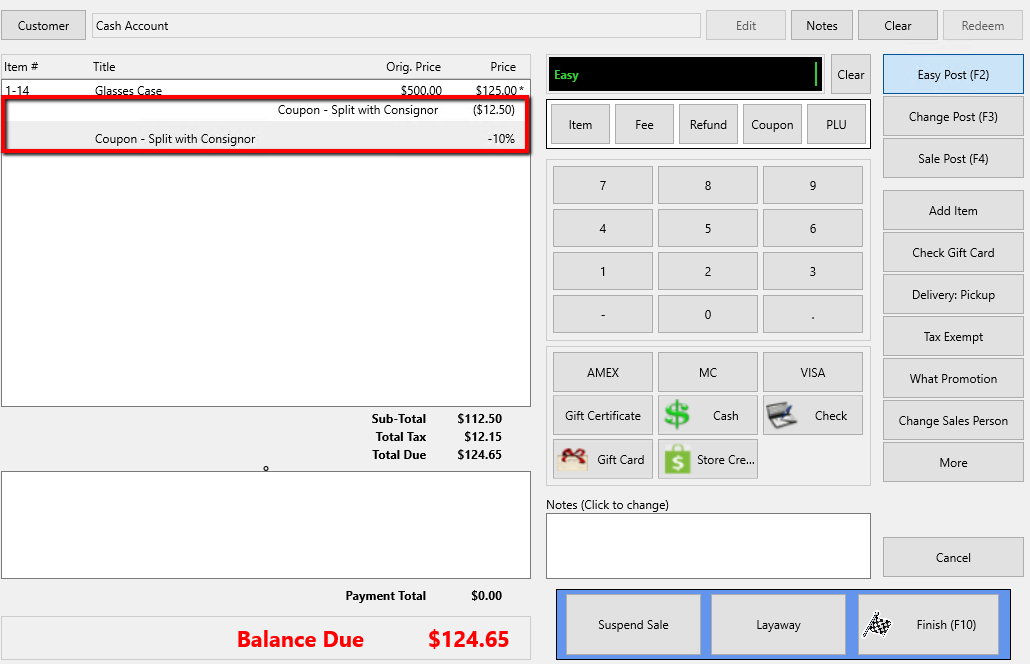
The coupon is applied to the sale and the amount is deducted from the total. - Select the Payment Type and select the Finish button when done.
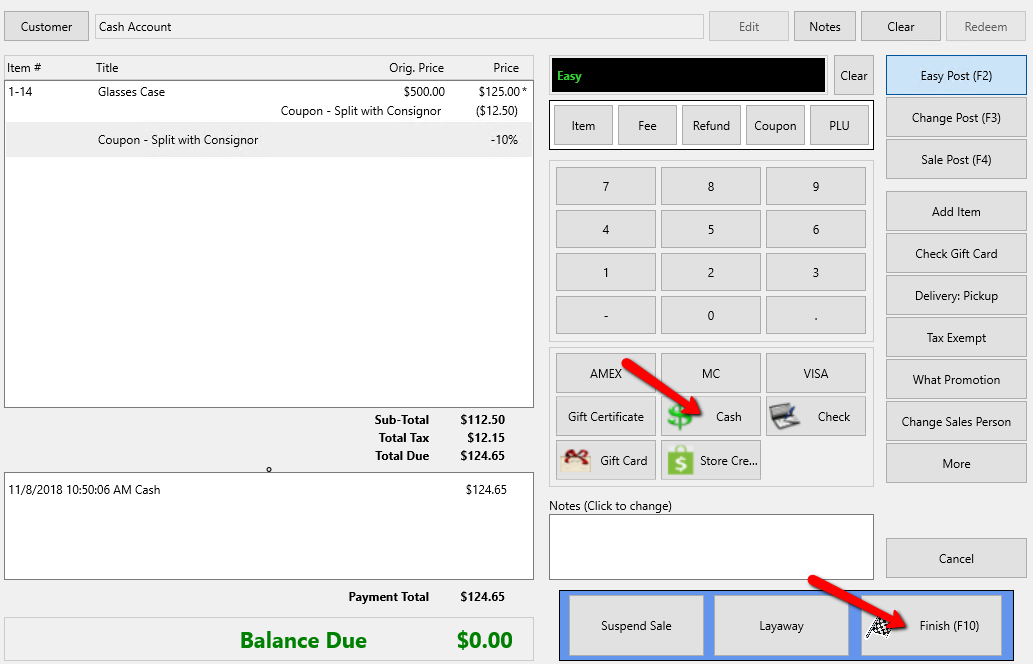


Note: Coupon is for an equal split between the store and the store based on the percent entered.
Next Article In Section
Click the following link to move to the next article in this section:
Remove a Payment From a Sale