Table of Contents
Exporting to Quickbooks Online Using The Quickbooks Link Overview
Note: You must have A Quickbooks Online Plus subscription in order to sync using the Quickbooks Link.
Here is the video that covers this content:
How To Use The Quickbooks Link To Export To Quickbooks Online
For more information on how transactions are brought over into Quickbooks, please view the following video:
Opening The Quickbooks Link
To begin your first Quickbooks export, open up the Quickbooks link and enter in your serial number if you have not already done so.
- Open the Liberty REACT Inventory Module and then click the QB Link icon.

- If this is the first time you have ever opened the QB Link, you will be prompted to enter in your serial number. If you do not have the serial number, please contact the Resaleworld Sales Department at 1-800-785-4800

Quickbooks Online Link and GL Account Settings
You will need to select which Quickbooks solution (Quickbooks Desktop Software or Quickbooks Online) you will want to use. It is best to consult with a certified public accountant (CPA) if you are unsure which option is right for you.
- With the Quickbooks Link open, click the File menu at the top left corner and select Settings.

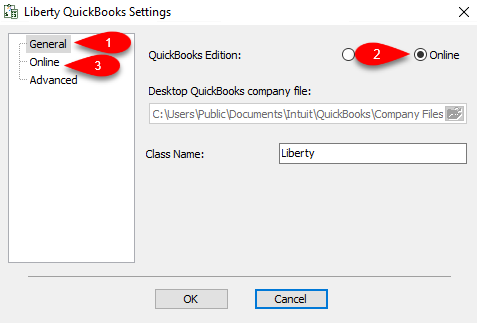
- Select the General tab on the left, then select the radio button next to Online if it is not already selected.
Next click the Online menu option to the left.
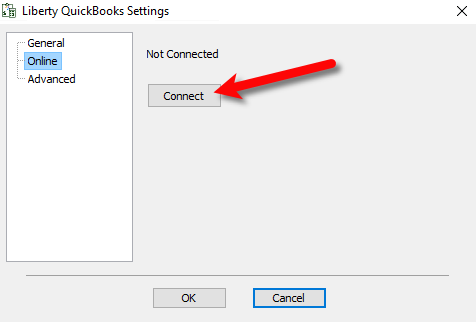
- Click the Connect button.
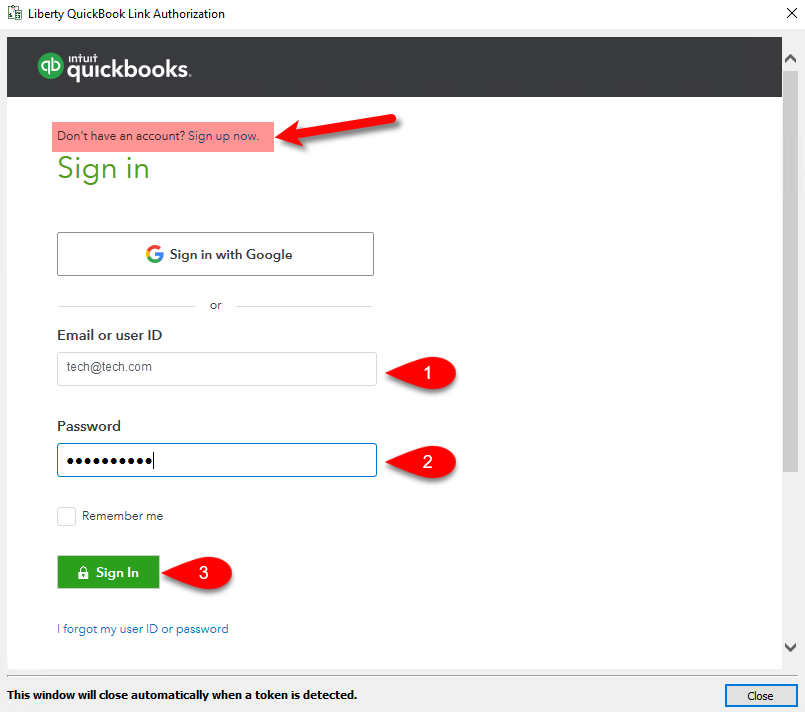
- If you do not have a Quickbooks Online account, you can click on the Sign up now link at the top.
Otherwise, sign in using your email/user ID and password, then click the Sign In button.
Note: You must have A Quickbooks Online Plus subscription in order to sync using the Quickbooks Link.
- You will need to confirm your identity, select any of the following options to do so and then click the Continue button.

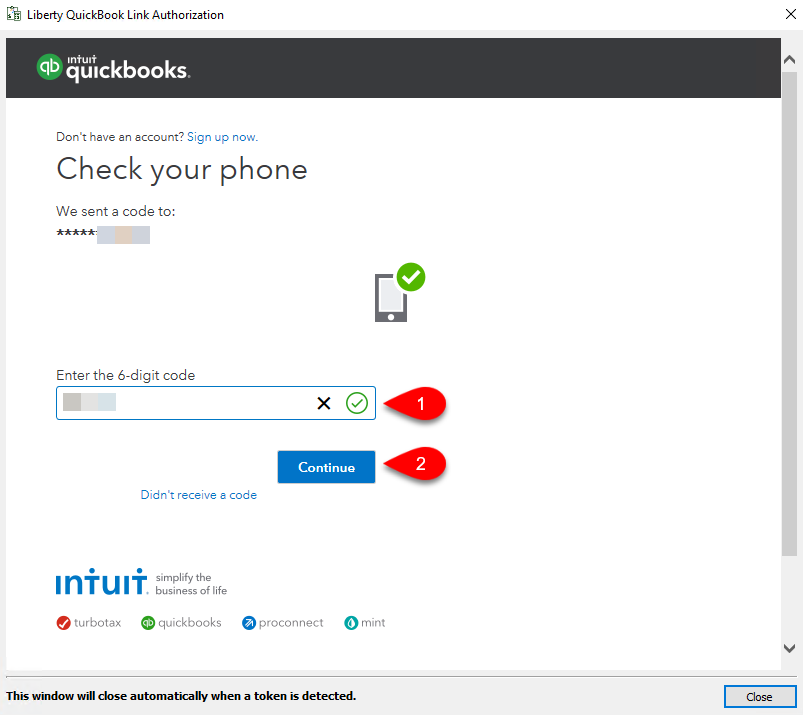
- If you selected to have a code texted to you or emailed to you, input the code in the correct field and then click the Continue button.
- Make sure to read the pertinent information regarding the secure sharing of data between your Liberty software and Quickbooks Online, then click the Connect button.

- The Quickbooks Link is now connected to your Quickbooks Online account.
You will be brought back to the Liberty Quickbooks Settings window, click the Advanced menu option to the left.
There are some additional settings that you can edit.

- ===== Consignment Payable: =====
This is an Accounts Payable General Ledger account that maintains all of the consignor obligation owed to consignors. When a check is written, the total consignor obligation owed will decrease from this account. - ===== Consignment Non-Payable: =====
This is a sub-account of the consignment payable general ledger account. This account maintains all of the non-payable obligation owed to all of your consignors. When a consignor’s store credit is used towards a purchase, the value maintained within this sub-account will decrease. - ===== Item Fee: =====
This account maintains the total item fee dollar value you have received when items sell with an item fee. - ===== Web Surcharge: =====
This account tracks any fees you have collected - Separate Consignors As Vendors:
When checkmarked, consignors will appear as their own separate vendor entities from within the Vendor center in Quickbooks.


Exporting For the First Time To Quickbooks Online
- Navigate to https://quickbooks.intuit.com or do a google search for quickbooks to get to their main website.

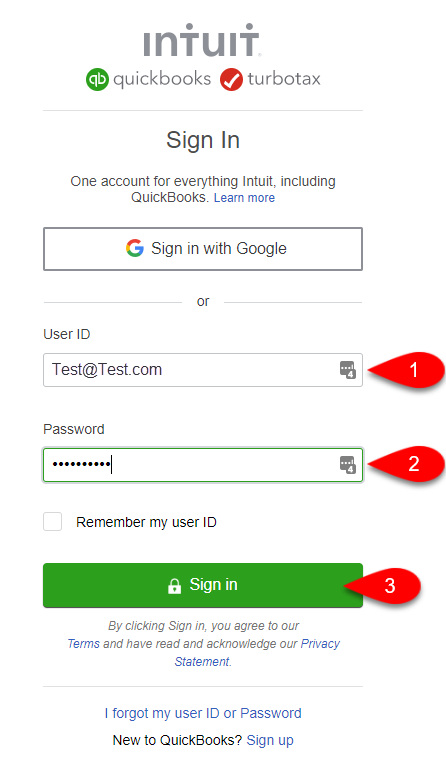
- Click the Sign In button.

- Type in your User ID/Email and your password to log into your Quickbooks Online account, then click the Sign In button.
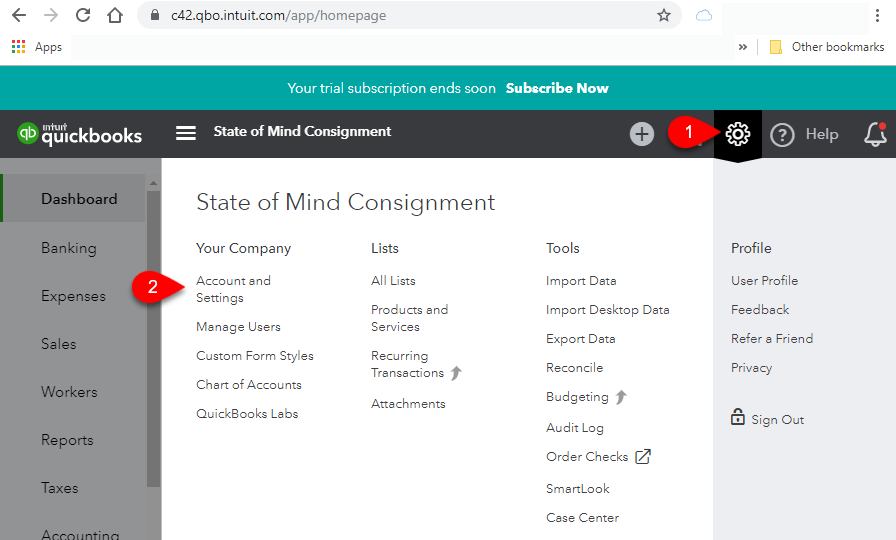
- Click the Cog symbol over on the top right of the page, then click on the Account and Settings menu option.
- Click on the Advanced menu option to the left then click on Enable account numbers.

- Click to checkmark the box next to Enable account numbers, you can also checkmark the box next to Show account numbers but it is not required for the Quickbooks Link to sync properly.
Click the Save button.

- Click on Track Classes.

- Click the box to the left of Track Classes so that it is checked, click the Save button, then click the X button at the top right corner.
Warning: If you forget to checkmark Track classes, general ledger information will go up without being associated with a class. Checking this box later will not retroactively add classes to general ledger entries that have already gone up. This feature is required in order to use the location subclass if you have multiple stores.

- Open the Liberty REACT Inventory Module and then click on the QB Link icon.
- If you see any Red entries, they will need to be corrected first.
Click once on the Red entry and then click the Edit button.

- Type in the G/L Account name you would like Liberty to create or sync into if Quickbooks has the account already created.

Note: To export into sub-accounts, simply use the colon (:) symbol between two accounts Example Bank of America:Check - Scroll down until you get to the bottom and make sure there are no more Red entries missing required information.
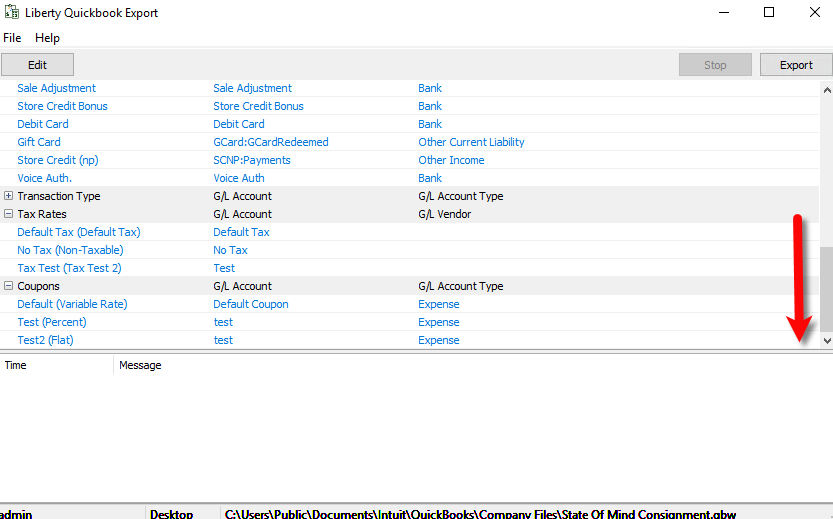
- Click the Export button.

- You will now be prompted for the start date you wish Liberty to export from.
Click the Month Year option at the top to quickly flip through the past years.

- You can use the left or right arrows to move backwards or forwards between the different years.
Once you have found the year you wish to export from, select the Month you want to start the export sync from.
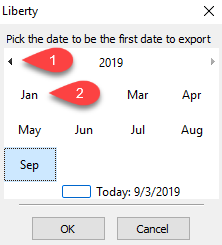
- Select the date of the Day you wish to export from and then click the OK button.

- Confirm that the date is correct on the following prompt and then click the Yes button.

- The Liberty Quickbooks Link will now sync to your company file on Quickbooks Online from the date you selected prior.

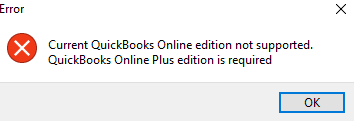
- If you receive a message stating Current Quickbooks Online edition not supported. Quickbooks Online Plus edition is required, you must upgrade your Quickbooks Online edition to Plus and then Export again.
- When you see The sync has been completed successfully, this means that the export is finished.

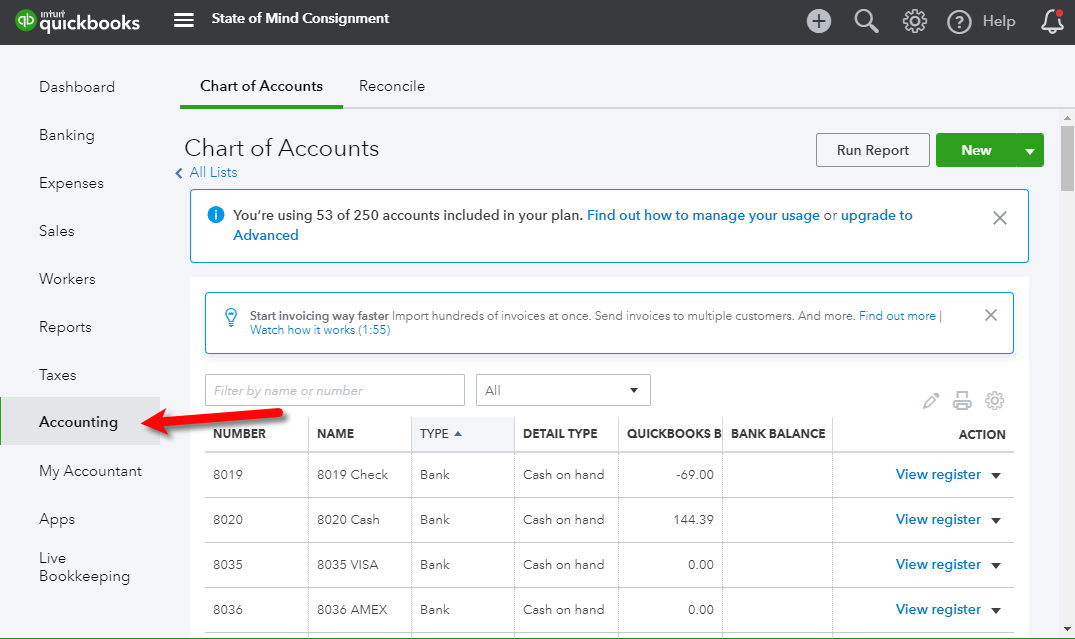
Note: If you see a message stating that there was an error during the export, please visit our Troubleshooting Quickbooks article. - You can then click on the Accounting menu option in your Quickbooks Online account to see the exported accounting data.


Accessing Export Log Data After Log Files Have Been Cleaned Up.
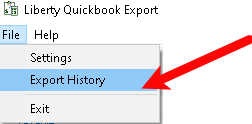
- Start by opening the QBlink module and clicking the File button in the top left corner, then click Export History.
- Once the Export History dialogue is open, to view the logs click the export you want to view and then click the View Export Log button.

- The export log will display on the right side of the window.


Next Article In Section
Click the following link to move to the next article in this section:
Quickbooks Online Link and GL Account Settings
Related Topics
Exporting to Quickbooks Online Using The Quickbooks Link Overview Quickbooks Online Link and GL Account Settings Exporting To Quickbooks Online For The First Time How To Initiate Subsequent Syncs To Quickbooks Online How To Use The Quickbooks Link To Export To Quickbooks Online How Transactions Flow From Quickbooks Link to Quickbooks How To Use The Quickbooks Link To Export To Quickbooks Desktop How To Export To Subaccounts Using The Quickbooks Link Company File Selection and GL Account Settings Setting Up Your Quickbooks Company File Exporting to Quickbooks Desktop Software Using The Quickbooks Link Overview