Table of Contents
Pre-Paid Buys Overview
This overview article covers the entire process of doing a Pre-Paid Buy, from start to finish.
Each section is broken up into separate articles under the Pre-Paid Buys help category, along with other features that are not essential to doing a first time Pre-Paid Buy.
Pre-Paid Buys allow you to either pay a client Cash or give Non-Payable Store Credit for a batch of inventory you do not have time to input right away.
This system also allows you to keep track of Pre-Paid Buys across multiple accounts, no matter where they are in the process.
Here is the video that covers this content:
Turning On Pre-Paid Buys
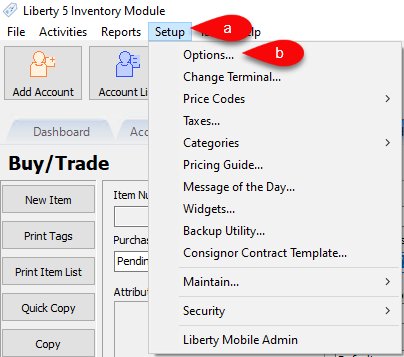
- Click the Setup menu
- Click on Options
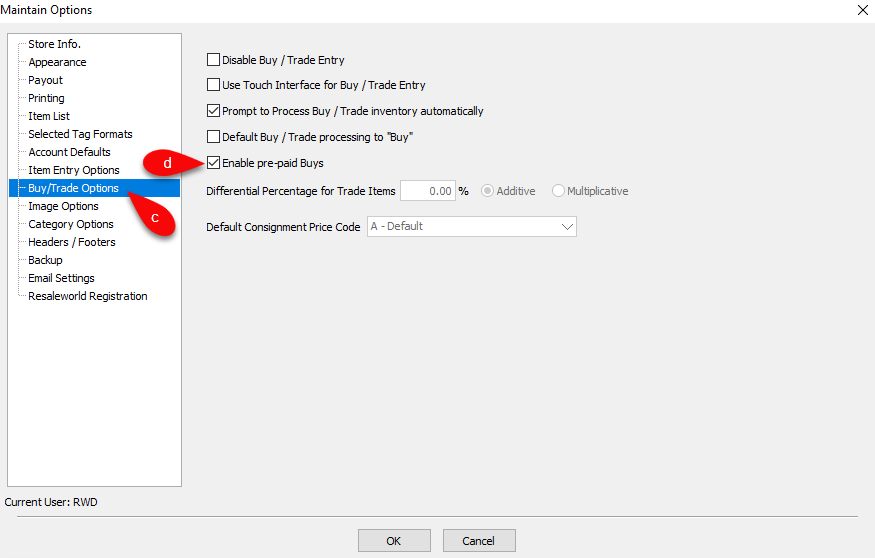
- Click on the Buy/Trade
- Click the checkmark box next to Enable pre-paid Buys to enable this feature.


Creating A New Pre-Paid Buy
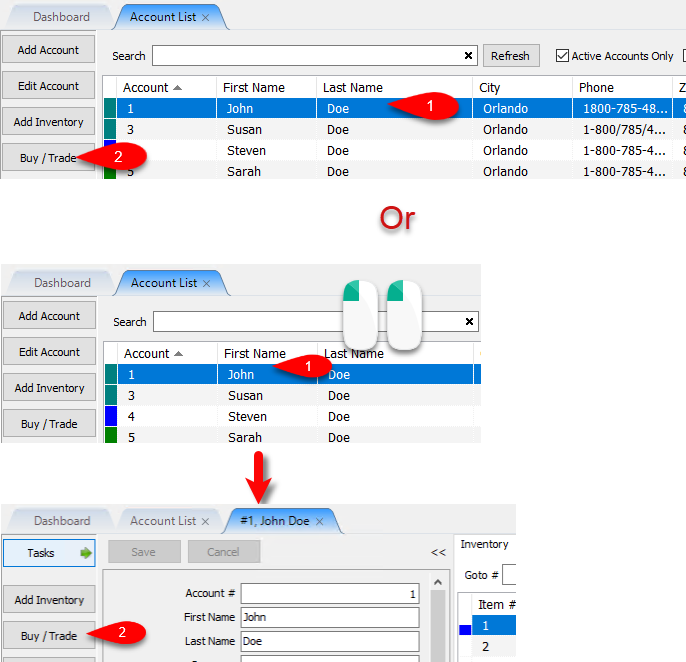
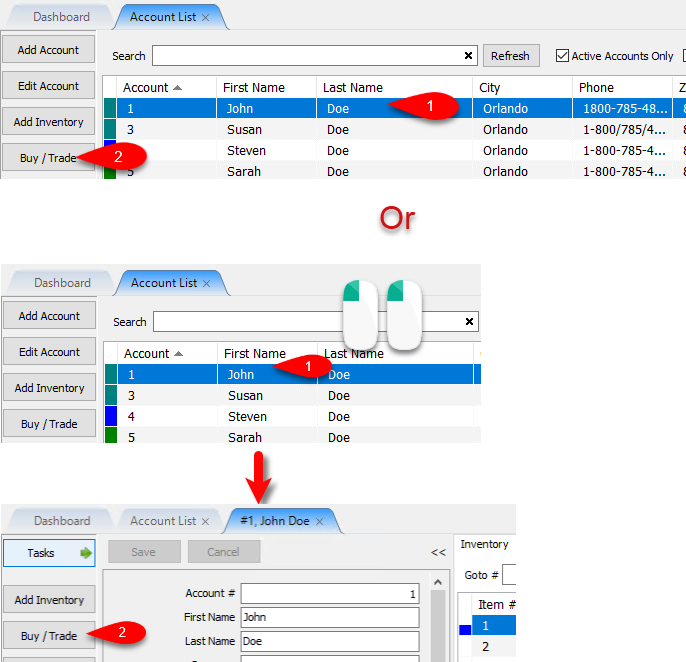
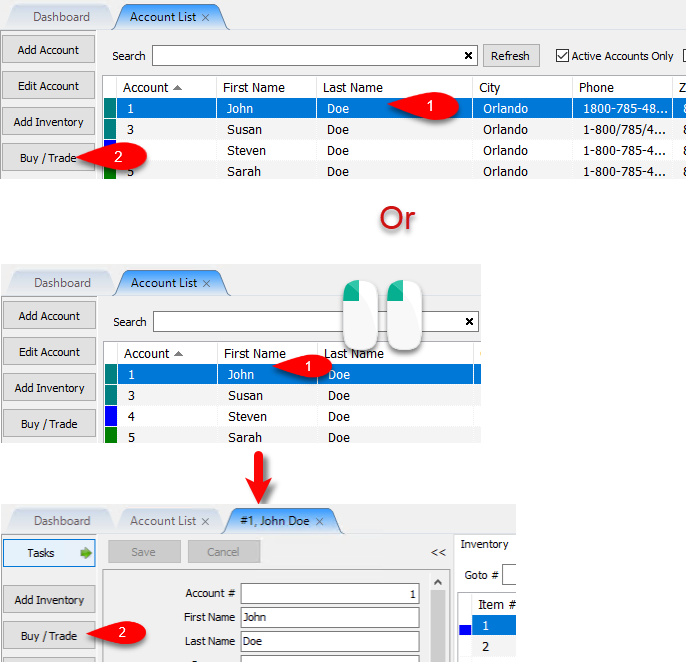
- From the Account List, select the account, then click on Buy / Trade.
Or
Open the Account first and then click on Buy / Trade.
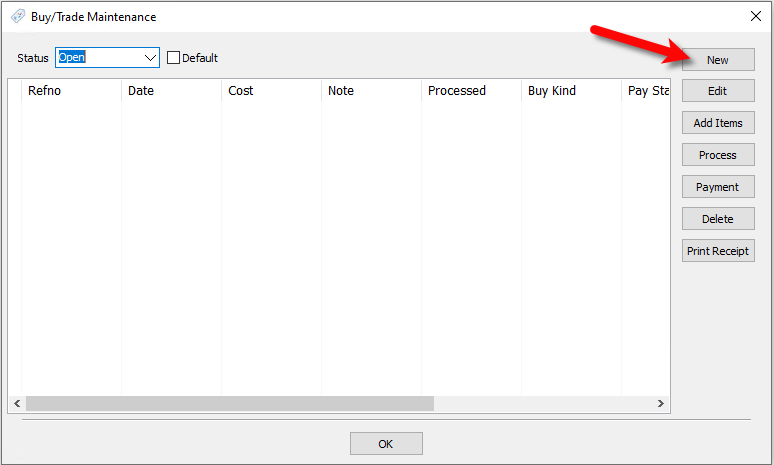
- Click the New button.
- We will now input our options for the Pre-Paid Buy.
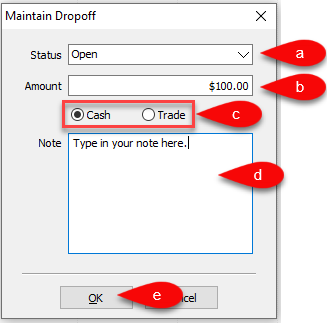
- Select the status you want to use, by default, this is set to Open.
Note: You can add your own statuses by going to Setup > Maintain… >Dropoff Status - Type the amount you would like to add as a credit to the Client’s Account for the batch of items you are taking in.
- Specify whether the amount added to the Client’s Account is either Cash or Trade.
- You can type a custom note here for the dropoff if there is something that you need referenced later.
- Click the OK button to create the Pre-Paid Buy entry.


Creating A Payment For A Pre-Paid Buy
- From the Account List, select the account, then click on Buy / Trade.
Or
Open the Account first and then click on Buy / Trade.
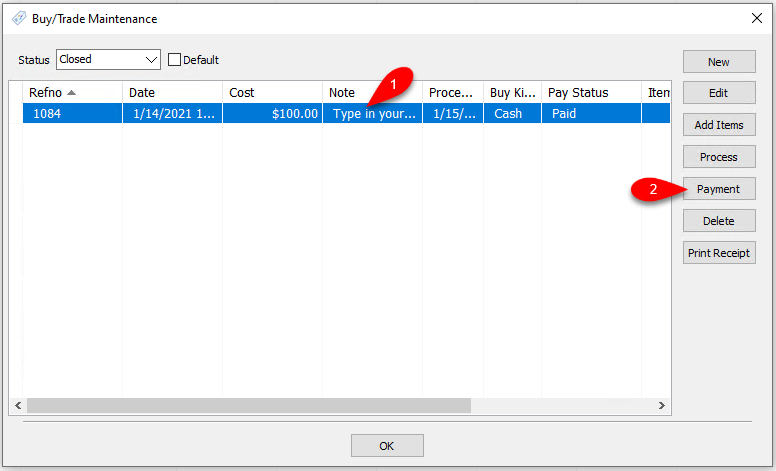
- Click the Pre-Paid Buy entry you would like to create a payment for and then click the Payment button.
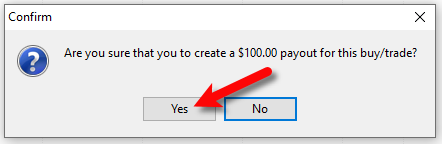
- Clicking the Yes button will create the transaction on the Client’s Accounts.
- This will create the Pre-Paid Buy transaction on the client’s account for the amount you specified.
Example: Here is an example of what this transaction looks like on a client’s account

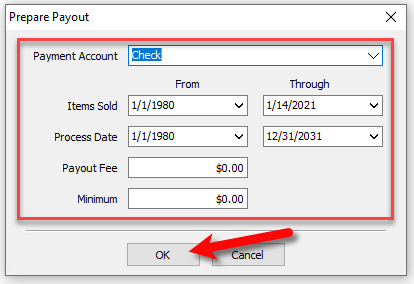
- You will be prompted with a Prepare Payout screen if you selected to create the amount as Cash.
You can click the Cancel button if you would like to create the payout later.
Otherwise, fill out the required fields as necessary and click the OK button.
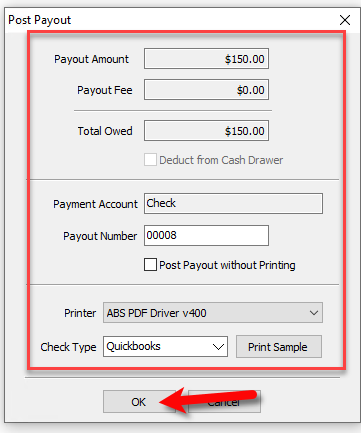
- The Post Payout dialog box will come up. The Payout Amount will be based on whatever criteria you used in the prior step, this payout can include more money than what was owed as part of the Pre-Paid Buy.
When you are done filling out the required fields, click the OK button.
- If you are not simply posting the payout to the account, then the check will print.


You will then get a prompt to check if the check printed out correctly.
If the check printed out fine, click the OK button.

Adding Items For A Pre-Paid Buy
- From the Account List, select the account, then click on Buy / Trade.
Or
Open the Account first and then click on Buy / Trade.
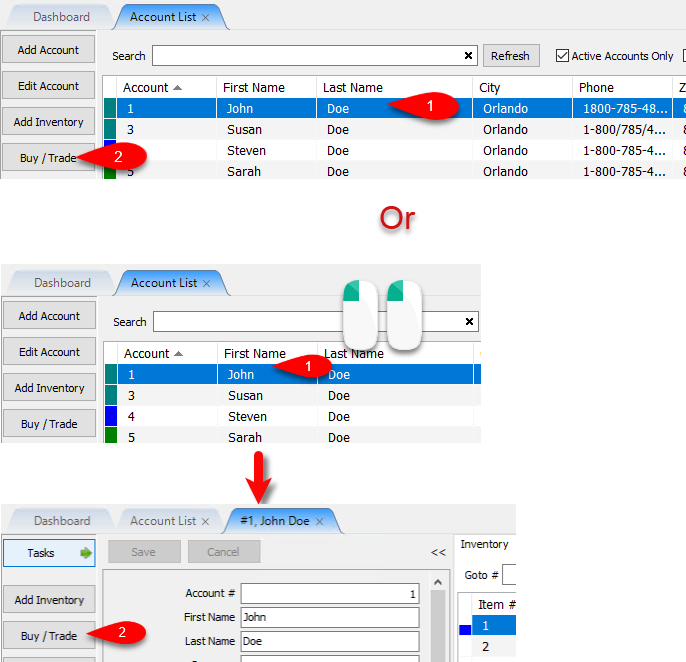
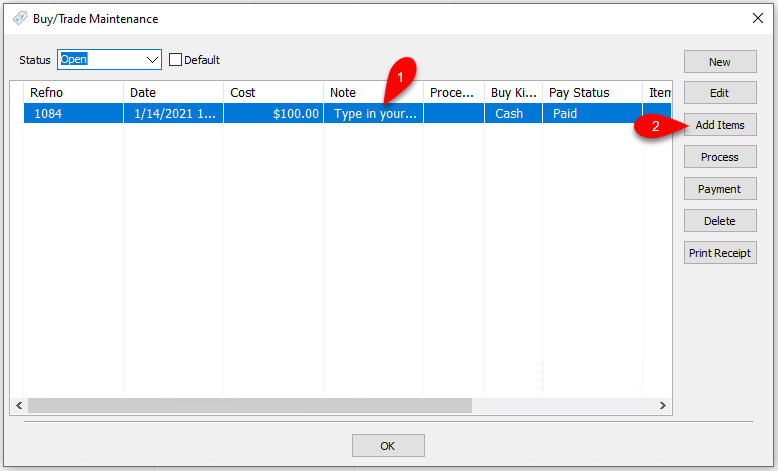
- You must add a Payment before you can add items to the Pre-Paid Buy.
Please visit the following article if you have not added a Payment yet:
Adding A Payment To A Pre-Paid Buy
Click the Add Items button.
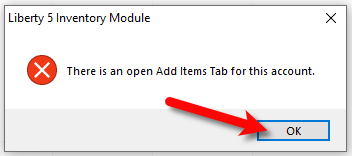
- If you are already adding items to the account, you will get the following prompt. Close out of the Add Items tab for the account after clicking OK. Then try again.
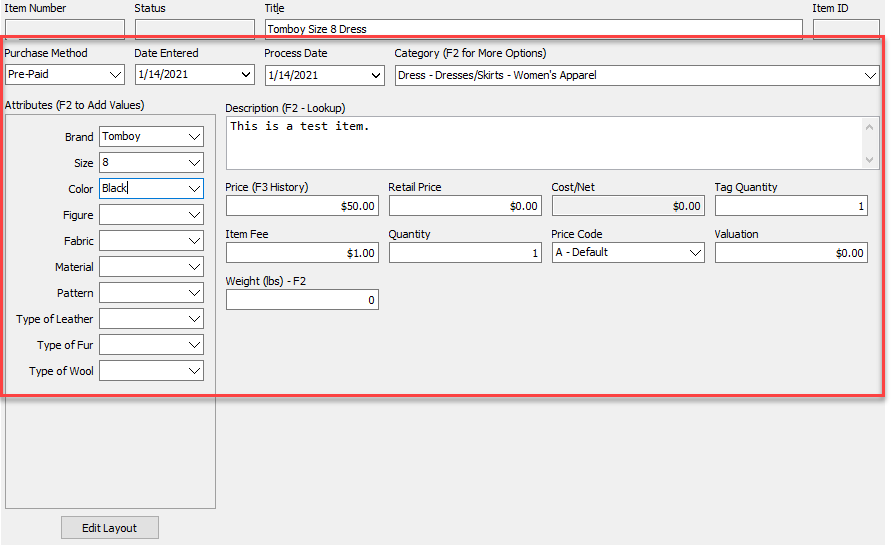
- Enter your first inventory item filling out the correct fields.
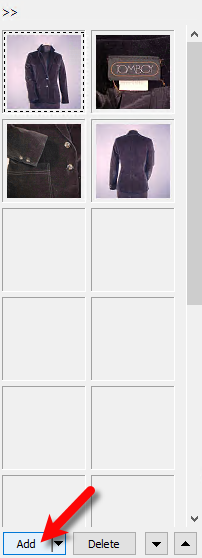
- You can then add images to your item as well.
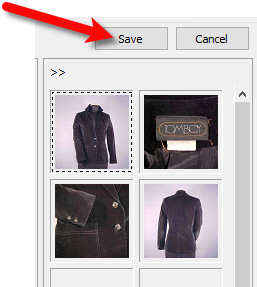
- When finished, click the Save button.
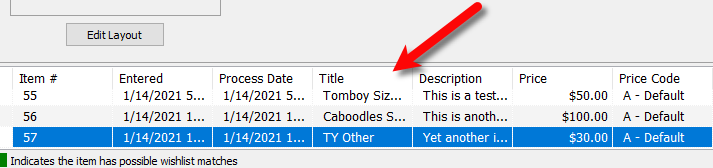
- Continue adding your inventory that is part of the Pre-Paid Buy.
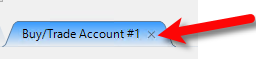
- When finished, close out of the Buy/Trade Account tab where you were adding the inventory.
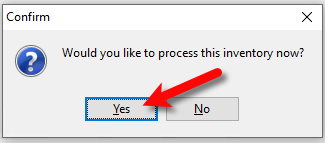
- You will then be asked if you would like to Process the inventory now?. Click the Yes button.


This simply sets the inventory for sale in the Point of Sale and distributes the cost/net across all items added to the Pre-Paid Buy based on the amount you typed in for the total transaction payment.
The cost is evenly distributed based on the price of the item.
Example:

Printing A Receipt for a Processed Pre-Paid Buy
- From the Account List, select the account, then click on Buy / Trade.
Or
Open the Account first and then click on Buy / Trade.
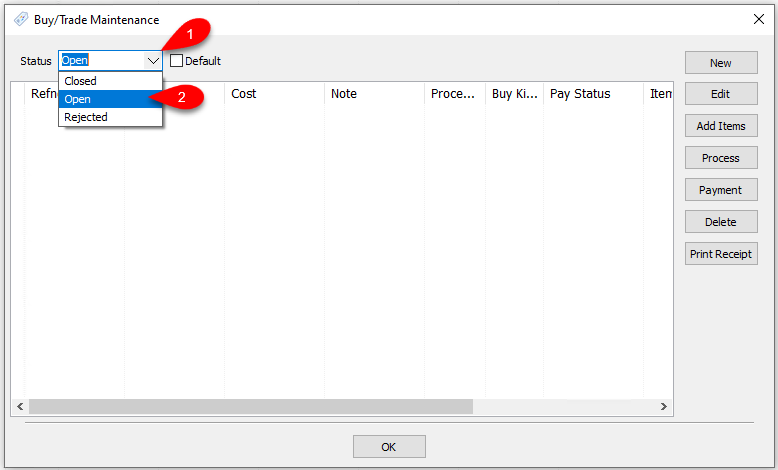
- Drop the Status field down and select Closed.
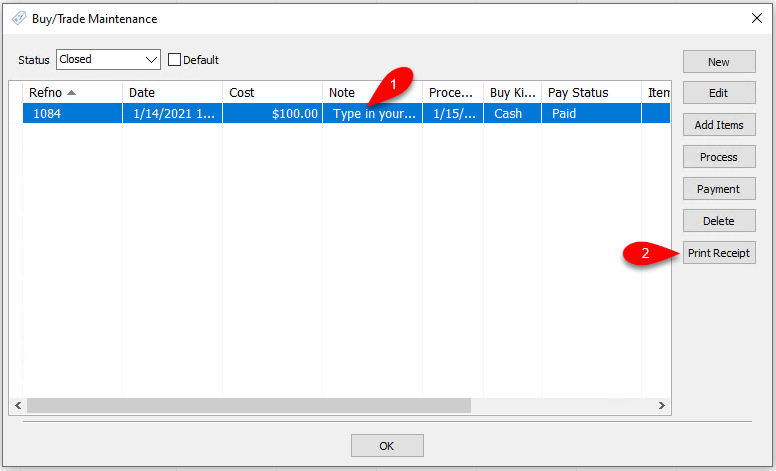
- Click the closed Pre-Paid Buy that you want to print a receipt for, then click Print Receipt.
- You will now be shown a preview that you can print out for your customer.


This is meant to be printed on a receipt printer but can be printed out on a document printer, if needed.

Next Article In Section
Click the following link to move to the next article in this section:
Turning on Pre-Paid Buys
Related Topics
Pre-Paid Buys Overview Turning on Pre-Paid Buys Creating A New Pre-Paid Buy Creating A Payment For Pre-Paid Buy Adding Items For A Pre-Paid Buy How To Process Inventory For A Pre-Paid Buy Printing A Receipt for a Processed Pre-Paid Buy How To Edit A Pre-Paid Buy How To Delete a Pre-Paid Buy That Has No Cash or Trade Transaction Added How To Add Your Own Pre-Paid Statuses How To Add A Pre-Paid Buy