Table of Contents
Creating A New Pre-Paid Buy
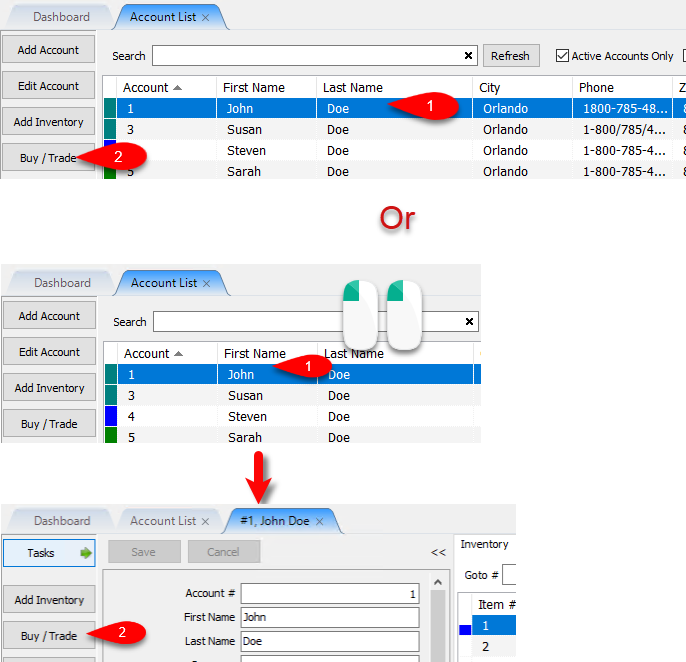
- From the Account List, select the account, then click on Buy / Trade.
Or
Open the Account first and then click on Buy / Trade.
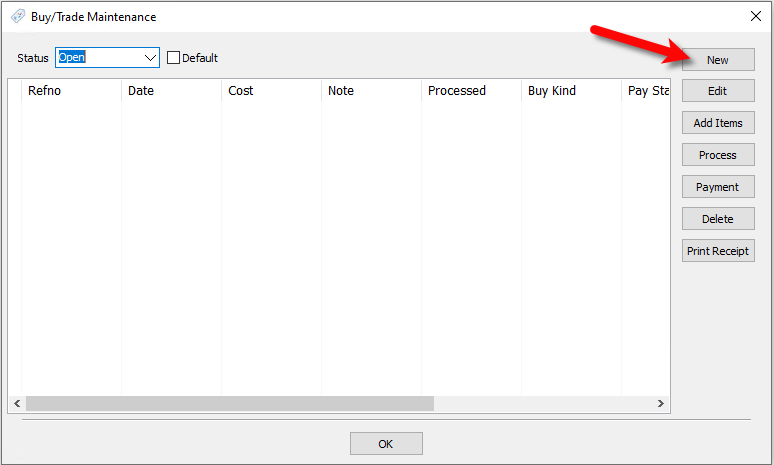
- Click the New button.
- We will now input our options for the Pre-Paid Buy.
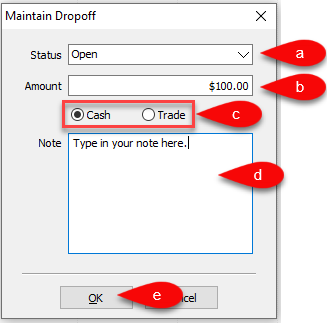
- Select the status you want to use, by default, this is set to Open.
Note: You can add your own statuses by going to Setup > Maintain… >Dropoff Status - Type the amount you would like to add as a credit to the Client’s Account for the batch of items you are taking in.
- Specify whether the amount added to the Client’s Account is either Cash or Trade.
- You can type a custom note here for the dropoff if there is something that you need referenced later.
- Click the OK button to create the Pre-Paid Buy entry.


Next Article In Section
Click the following link to move to the next article in this section:
Creating A Payment For Pre-Paid Buy
Related Topics
Creating A New Pre-Paid Buy Pre-Paid Buys Overview Turning on Pre-Paid Buys Creating A Payment For Pre-Paid Buy Adding Items For A Pre-Paid Buy How To Process Inventory For A Pre-Paid Buy Printing A Receipt for a Processed Pre-Paid Buy How To Edit A Pre-Paid Buy How To Delete a Pre-Paid Buy That Has No Cash or Trade Transaction Added How To Add Your Own Pre-Paid Statuses Using the Wishlist