Table of Contents
Consignor Center Store Setup Overview
Liberty API Setup
To get started with Consignor Center, we have to setup Liberty to link with https://consignorcenter.com
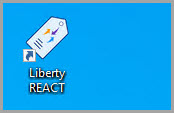
- Open the Liberty REACT
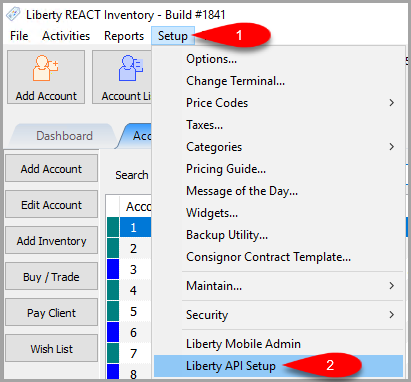
- Click on Setup then Liberty API Setup
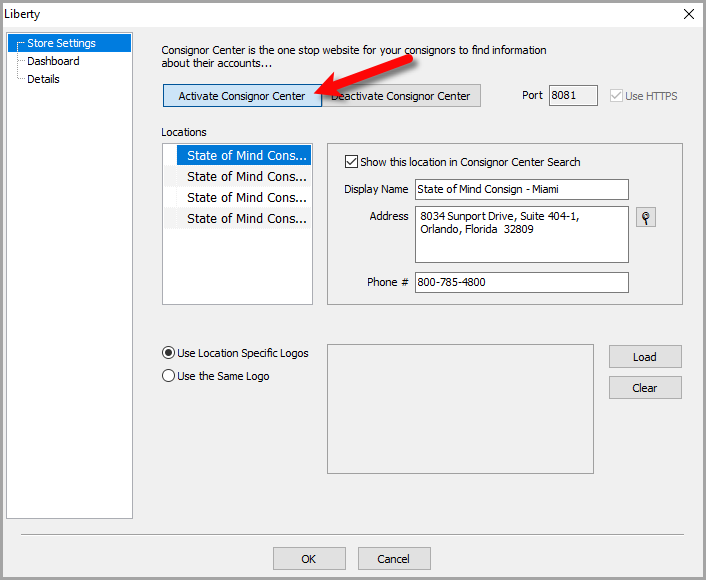
- Click the Activate Consignor Center button.
This will send over the key along with linking Consignor Center to the customer’s database.
- Now we can setup each location separately if we want to.
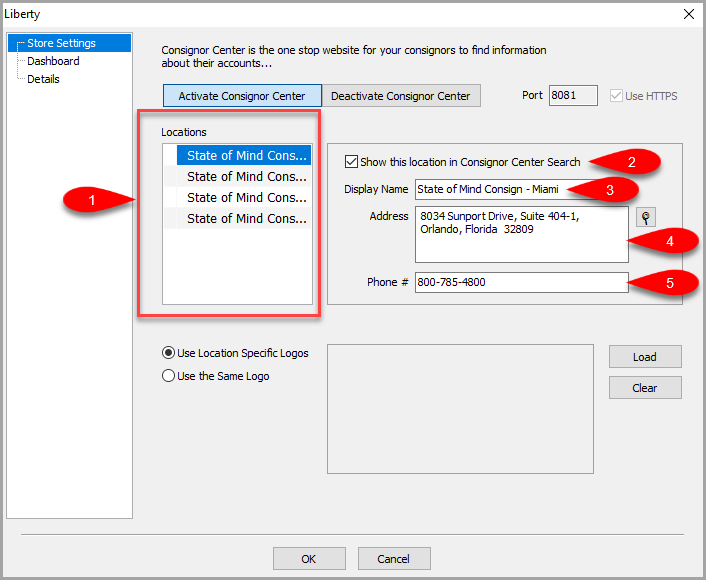
- You can select the location you want to start with eventually working through each one.
- Show this location in Consignor Center Search indicates whether you want the location to appear as a separate store within the same group of stores, available to a customer.
Note: Even though each store will be shown on consignor center, they will all appear together. Selecting any store connects the consignor to the same database since it is a single Liberty Cloud location in most cases. - Display Name indicates the full name you want the location to show up as in Consignor Center. If your store has a specific name your customers recognize the location as, you can type that into this field.
- Address indicates the address shown for the selected location. This is required and must be properly formatted with your exact store’s location address or else the map showing your store’s location will not function properly.
- Phone # indicates the phone number shown for the selected location.
- Loading store logos can be easily done through this area as well.
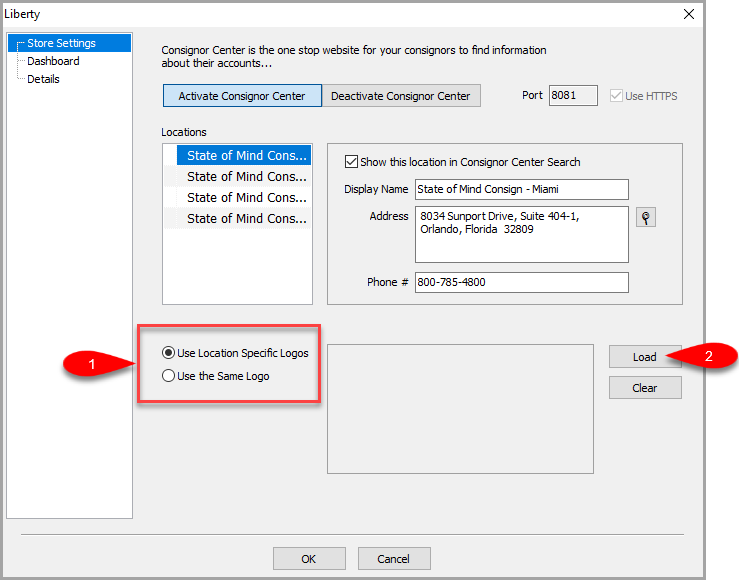
- Select if you want to Use Location Specific Logos which will allow you to load a separate logo per store.
You can also choose to Use the Same Logo across multiple stores. - Click the Load button to locate and add the logo.
- Use the left File Explorer area to find where your logo image is for the store you selected or if you opted for a single logo across all stores, this will be your logo.
Click the Open button.
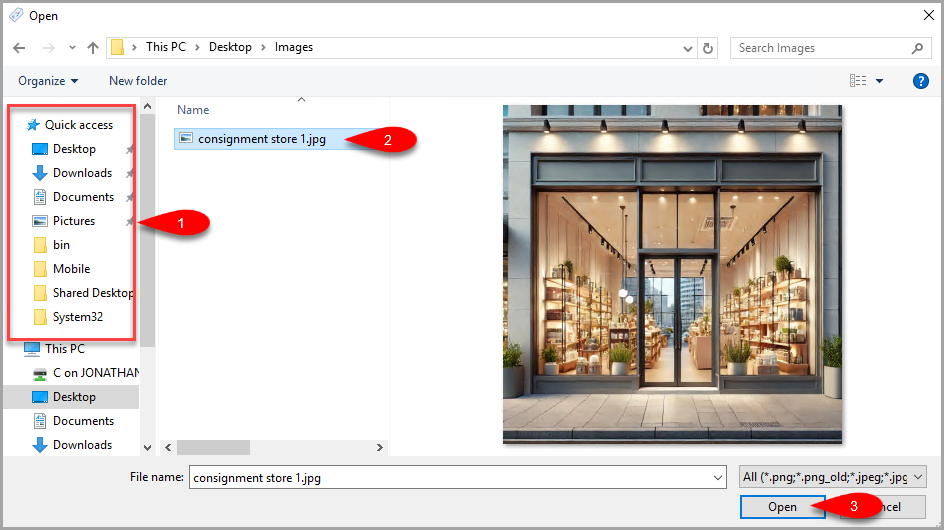
- The Logo Image should now appear in the image viewer to indicate this is now loaded.


Now we can click on the Dashboard menu option to work on the next area’s settings.

Consignor Center Website View
Here is what the Consignor Center Dashboard will look like to a consignor when all options are enabled on the website desktop version:

Here is what the mobile version looks like:

Configuring The Dashboard Area
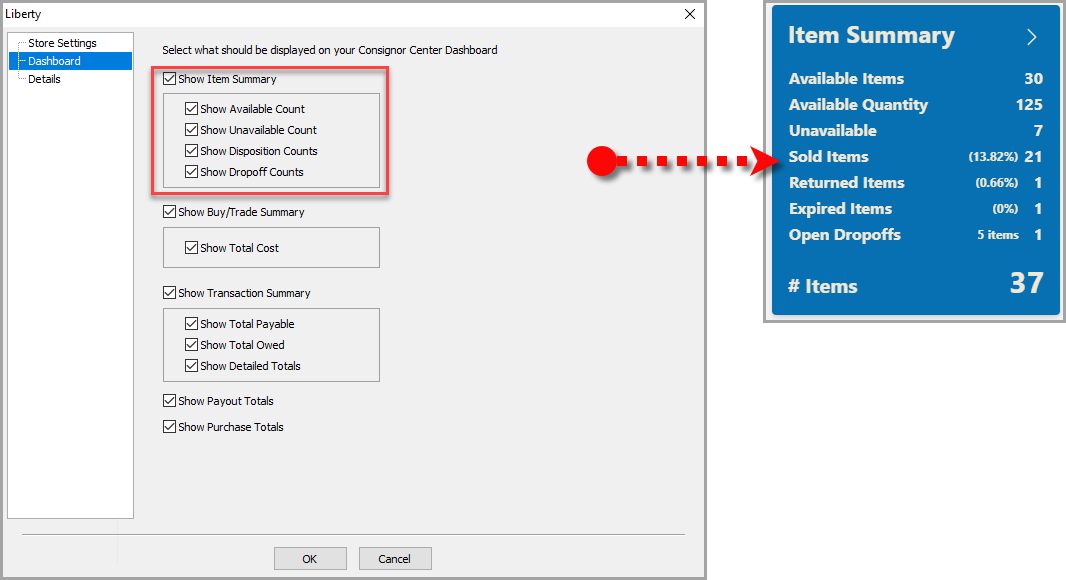
- We can change whether we want to Show Item Summary along with any of this area’s additional options.
Note: Purchased outright items and trade items do not appear in these totals. Store owned items do not appear in the Consignor Center.
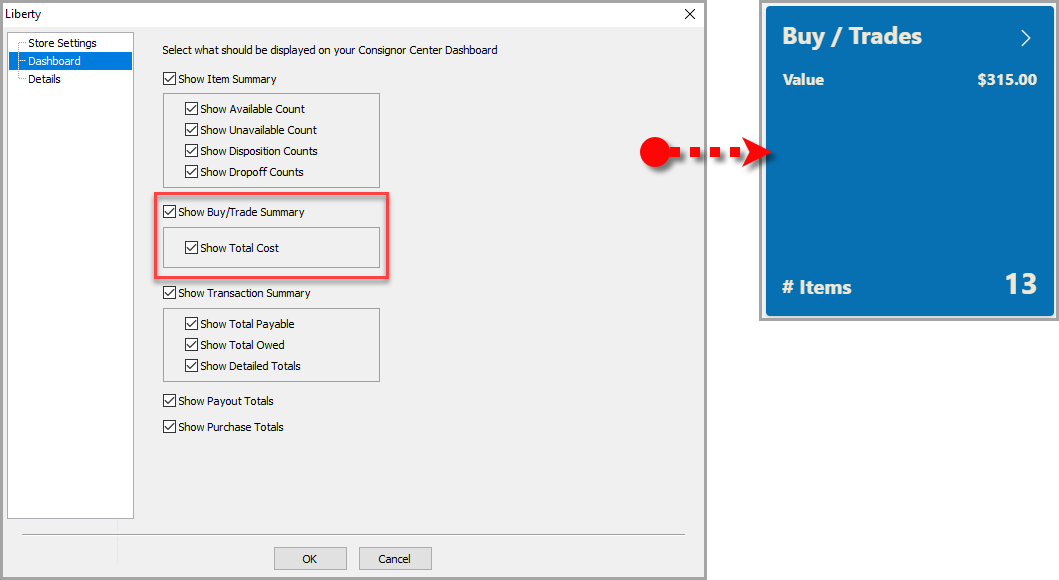
- We can change whether we want to Show Buy/Trade Summary along with checkmarking the option to Show Total Cost.
- We can change whether we want to Show Transaction Summary along with any of this area’s additional options.
Note: The pay delay setting in Liberty is used to determine the total payable.
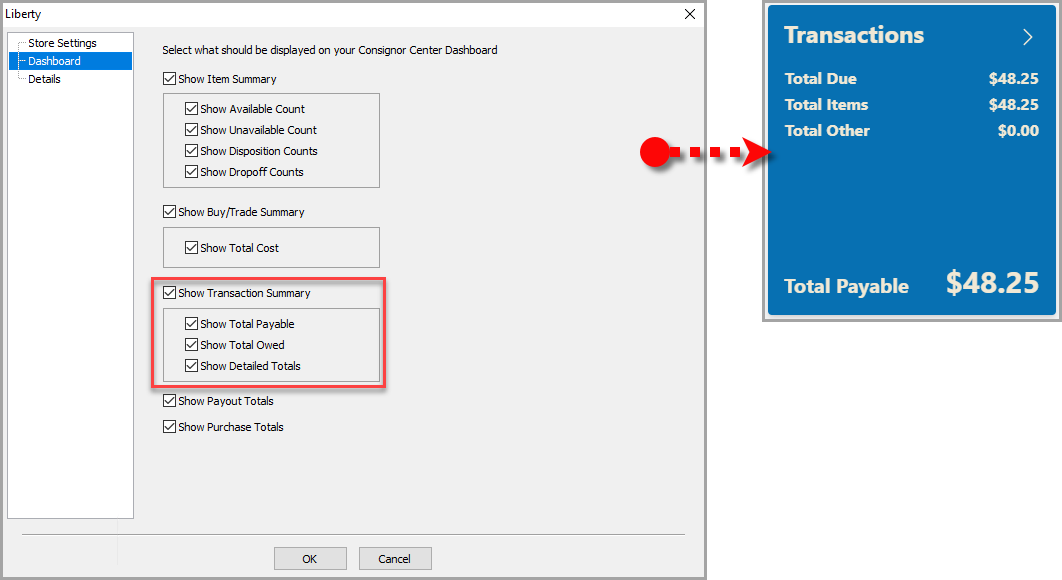
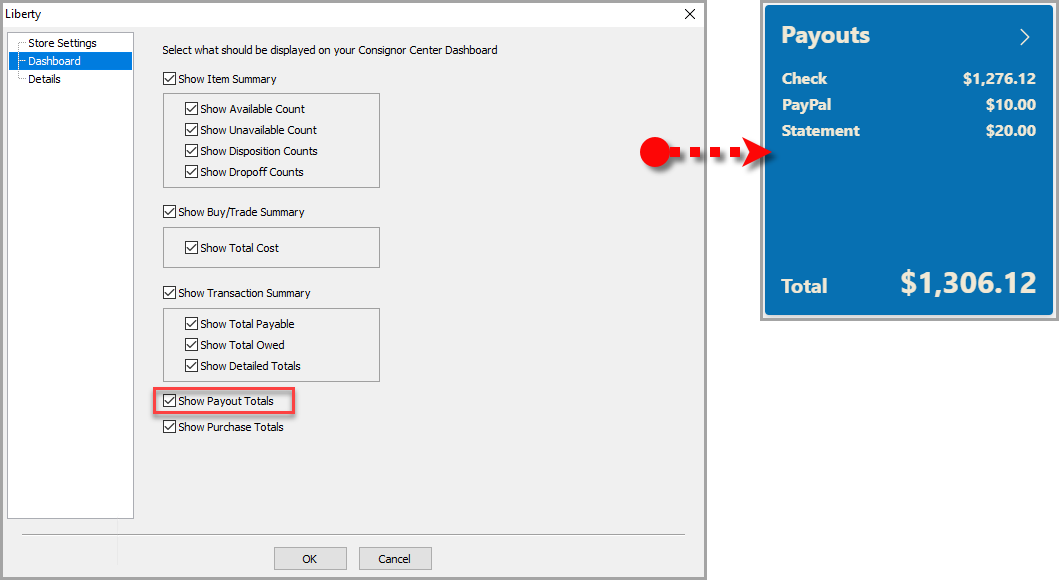
- We can change whether we want to Show Payout Totals
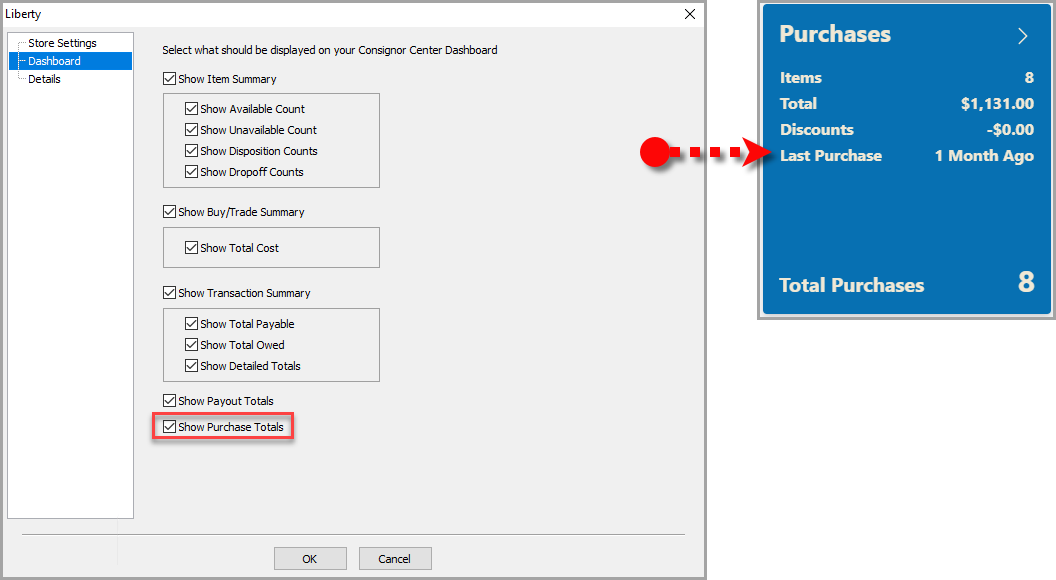
- We can change whether we want to Show Purchase Totals.
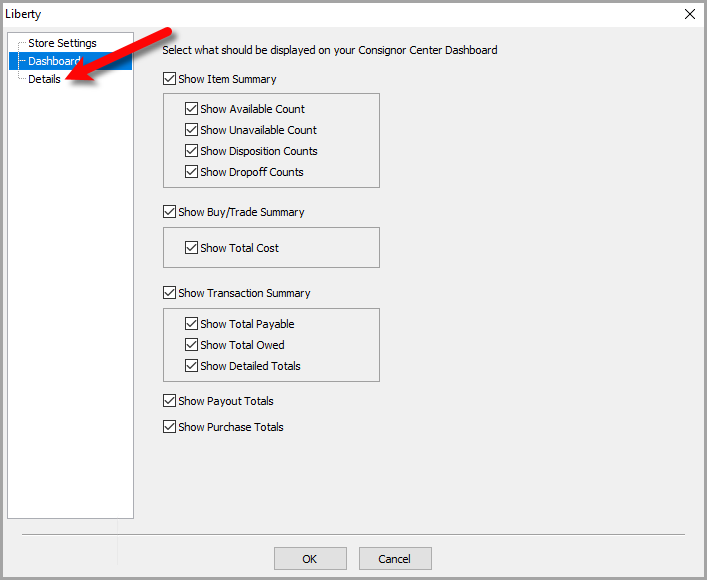
- Once we are finished with the Dashboard area, we can move on to the Details menu option.


Configuring The Details Area
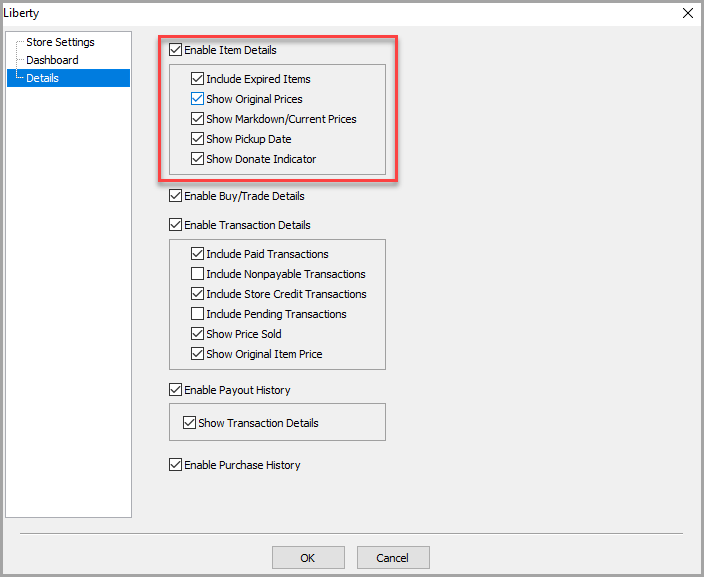
- We can change whether we want to Enable Item Details along with any relevant options in this area.
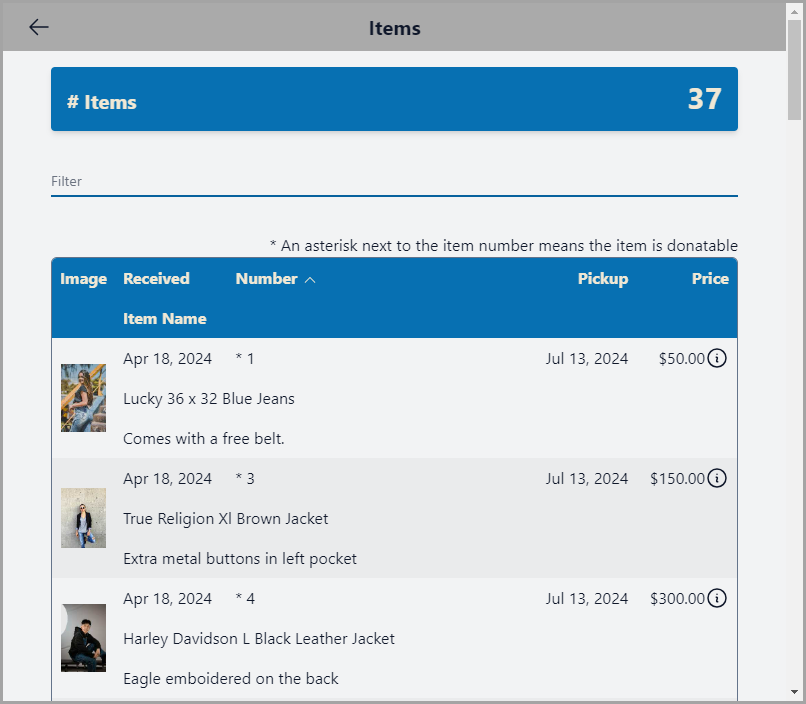
Consignor Center view of Item Details
Info: You can sort any of the columns by clicking on them. You can also type a search term within the filter box to look for specific items.
Desktop View:
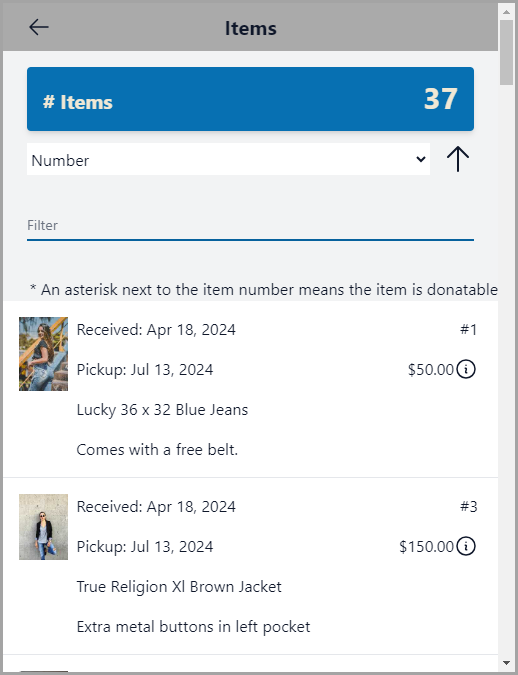
Mobile View
Info: You can sort any of the columns taping on the dropdown before the up arrow. You can also type a search term within the filter box to look for specific items.
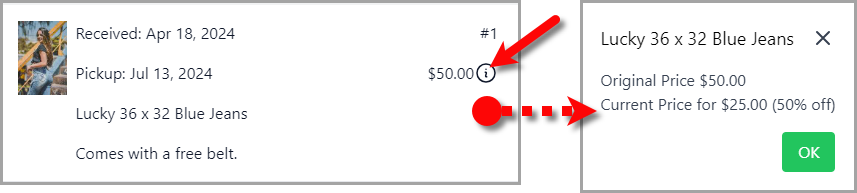
You can click or tap the circular info icon to get current markdown price.
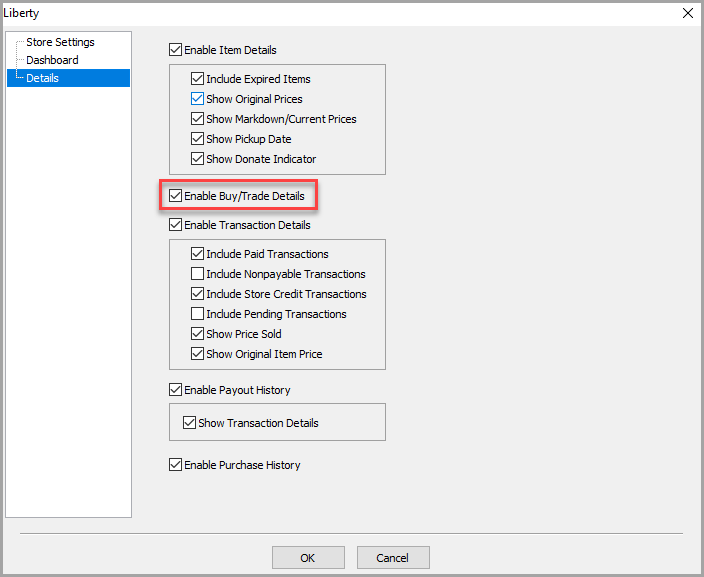
- We can change whether we want to Enable Buy/Trade Details.
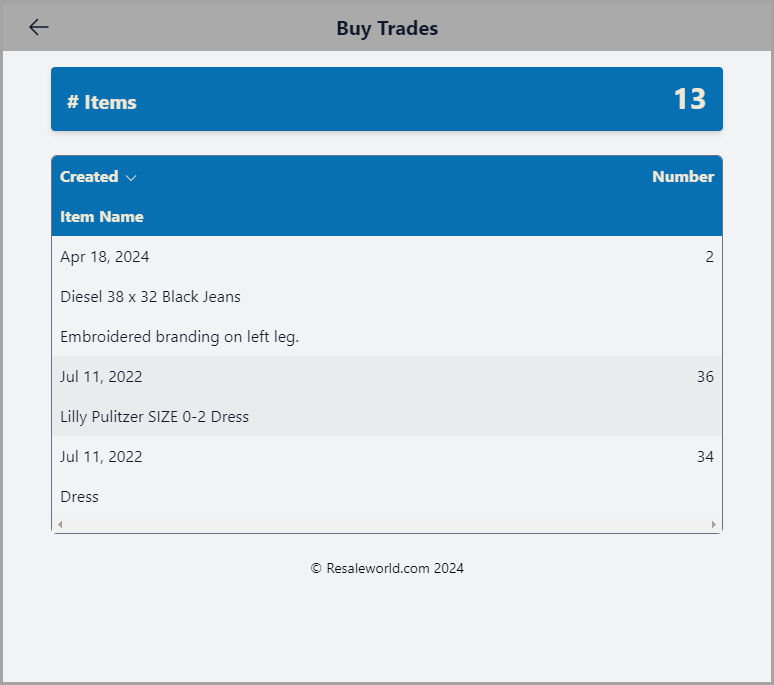
Desktop View
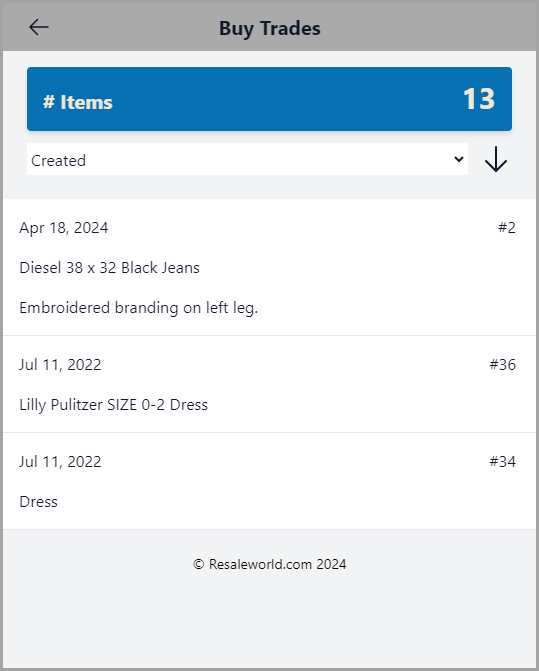
Info: Images do not show for Buy/Trades
Mobile View
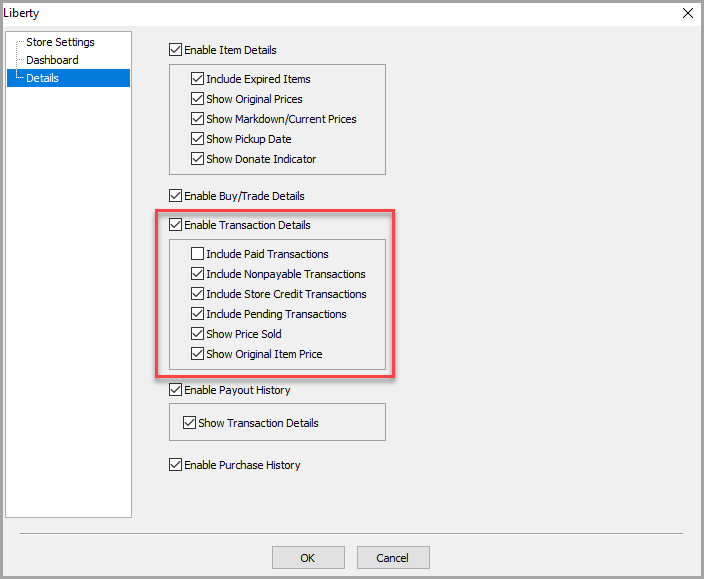
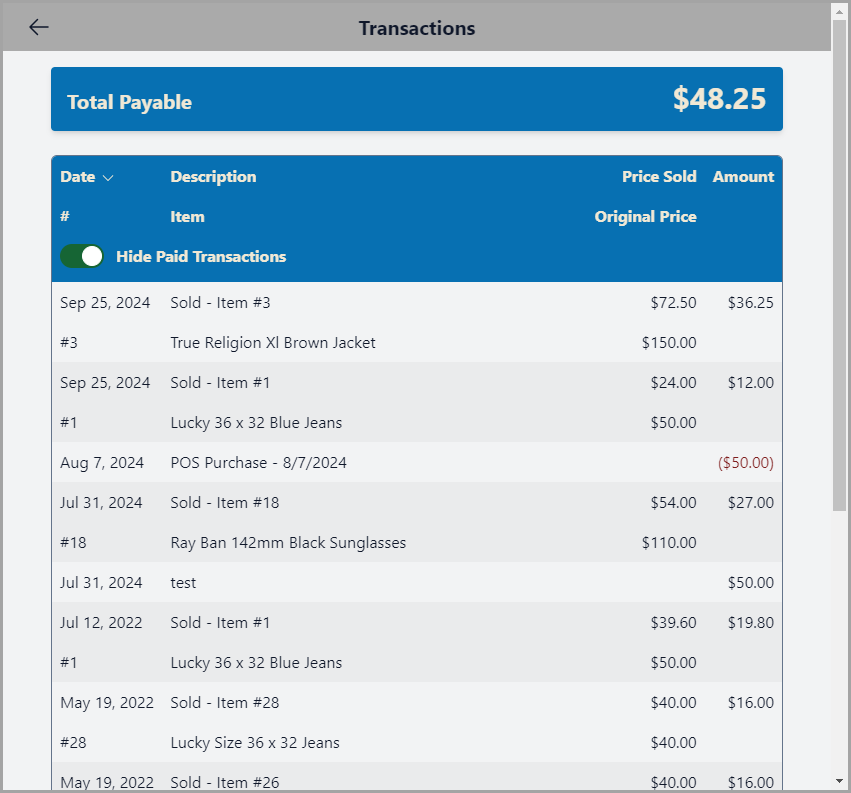
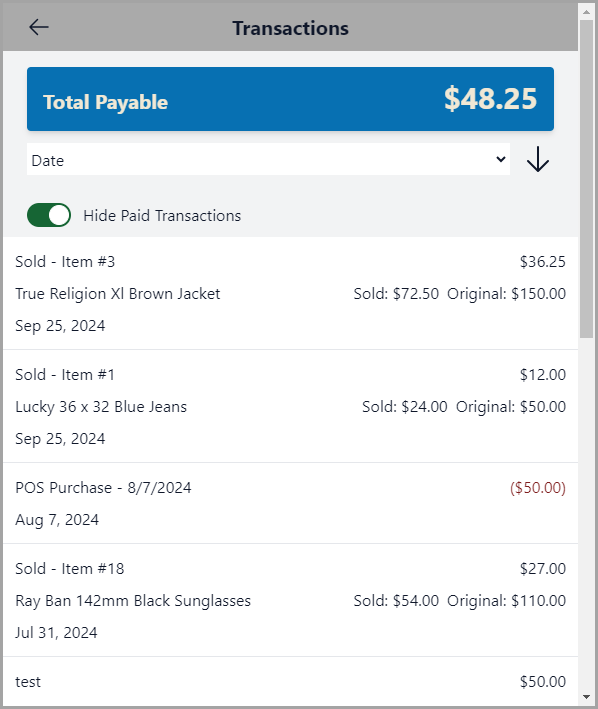
- We can change whether we want to Enable Transaction Details along with other options available in this area.
Note: Unchecking the Include Paid Transactions box will remove transactions that have already been paid out. This option is useful if you only want to show unpaid transactions. Checkmarking Include Paid Transactions will show a toggle switch that allows your consignor to Hide Paid Transactions.
Desktop View
Info: You can change the sorting of information by clicking on the column you want to sort by. Clicking on the column more than once will also change the sort direction. The Hide Paid Transactions toggle switch only appears if Include Paid Transactions is checkmarked
Mobile View
Info: You can sort by different options by selecting the dropdown next to the sort direction arrow. The Hide Paid Transactions toggle switch only appears if Include Paid Transactions is checkmarked
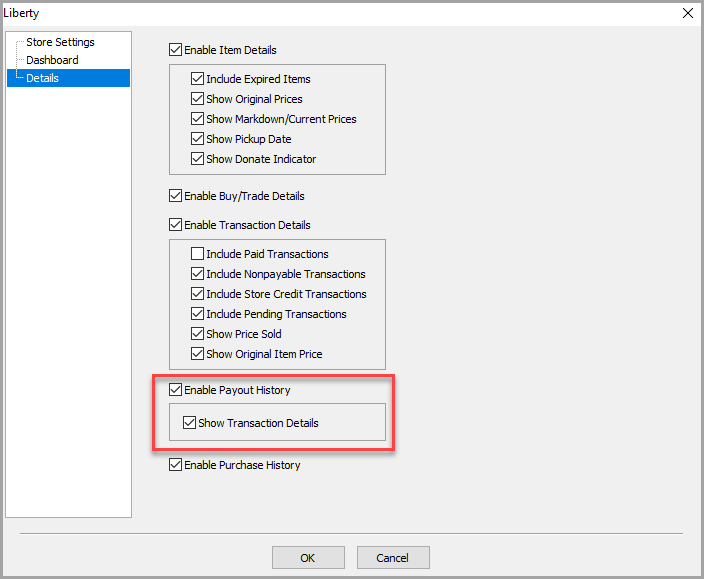
- We can change whether we want to Enable Payout History along with other options available in this area.
Desktop View
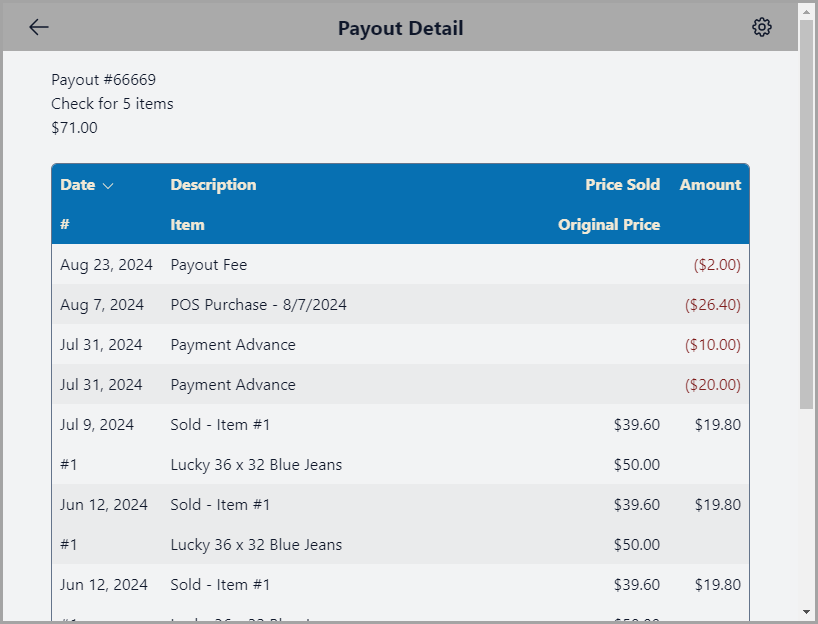
Info: You can change the sorting of information by clicking on the column you want to sort by. Clicking on the column more than once will also change the sort direction. If show Transaction Details is enabled, you can click on the individual payout to view the individual transactions that make up the payout.
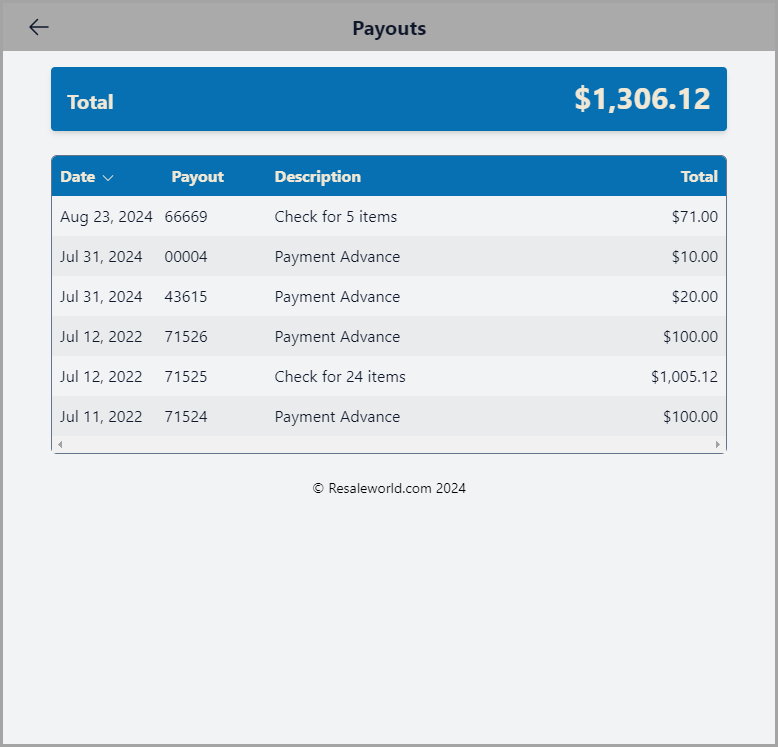
Desktop View Payout Transactions Detail
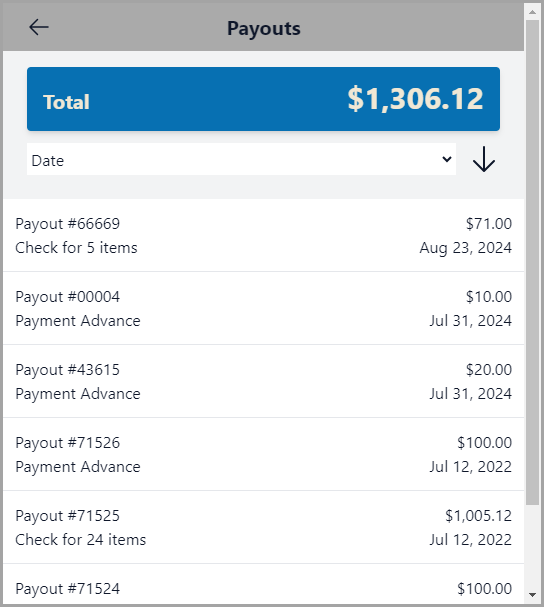
Mobile View
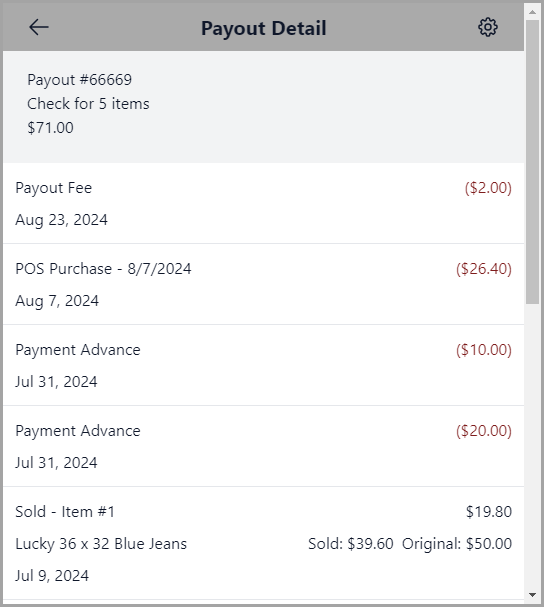
Info: You can sort by different options by selecting the dropdown next to the sort direction arrow. If show Transaction Details is enabled, you can tap on the individual payout to view the individual transactions that make up the payout.
Mobile View Payout Transactions Detail
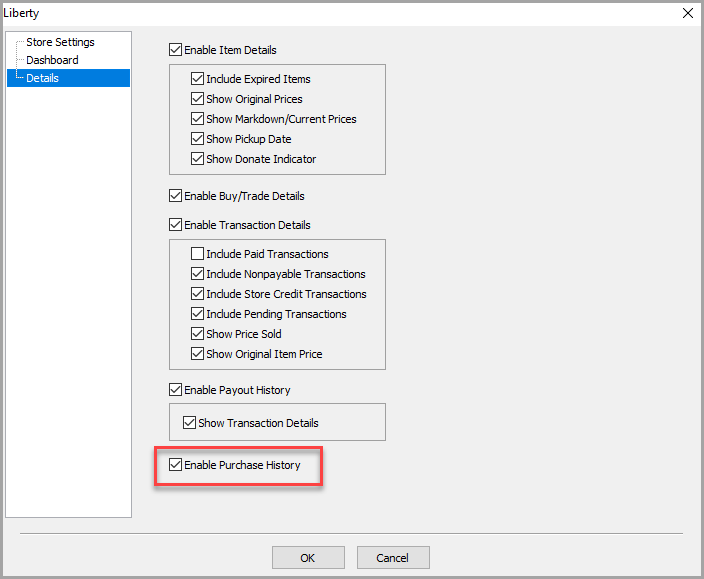
- We can change whether we want to Enable Purchase History.


Desktop View
Info: You can change the sorting of information by clicking on the column you want to sort by. Clicking on the column more than once will also change the sort direction. You can also click on any receipt number to view a PDF of the actual receipt.

Mobile View
Info: You can sort by different options by selecting the dropdown next to the sort direction arrow. You can also tap on any receipt number to view a PDF of the actual receipt.

Desktop and Mobile View of Receipt PDF
Info: If you have a receipt logo loaded into your Point of Sale, it will also be included in the PDF version of the receipt on consignor center.

Consignor Center First Time Login Instructions
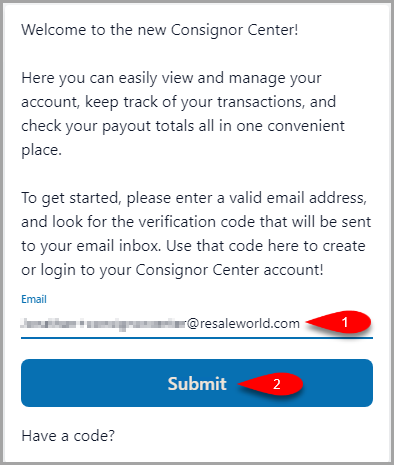
- Type in the email address you want to use into the Email field and then click the Submit button.
Note: This does not have to be an email you use with any of the stores. You can link other email addresses that you have used before adding the stores to your account and Consignor Center will attempt to match one of your linked emails (including the one used here) to an account at the store.
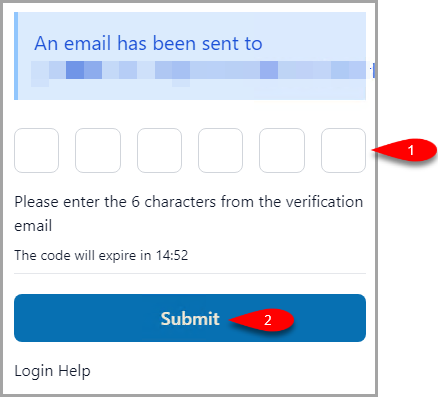
- You will get an email with a 6 character verification code.
Paste this into the first empty box and then click the Submit button.
Note: Consignor Login will keep you logged in for 6 months.
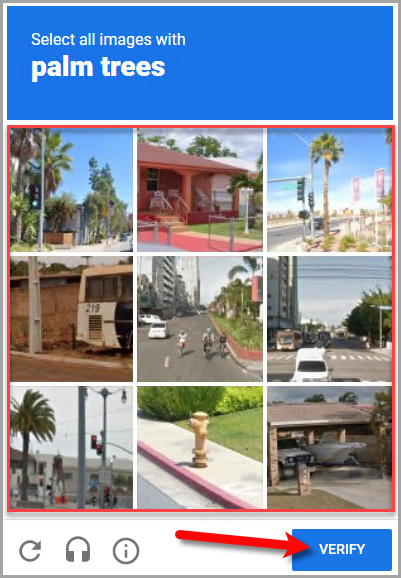
- If you receive a CAPTCHA prompt, follow the instructions and then click the Verify button.
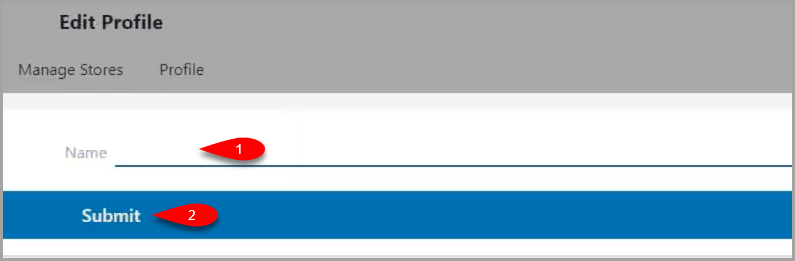
- Type in your name that you wish to associate with your Profile and then click the Submit button.
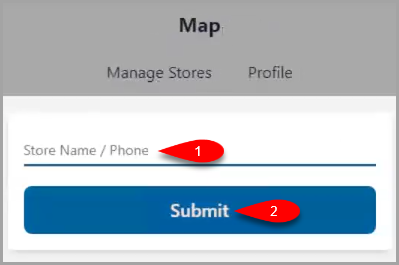
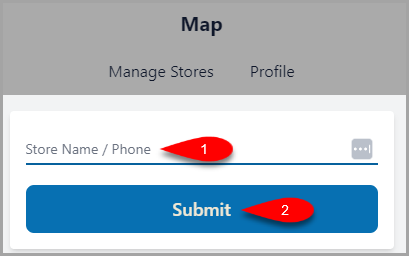
- In the Store Name / Phone field, type in either the store name or phone number associated with the store you are consigning at and then click the Submit button.
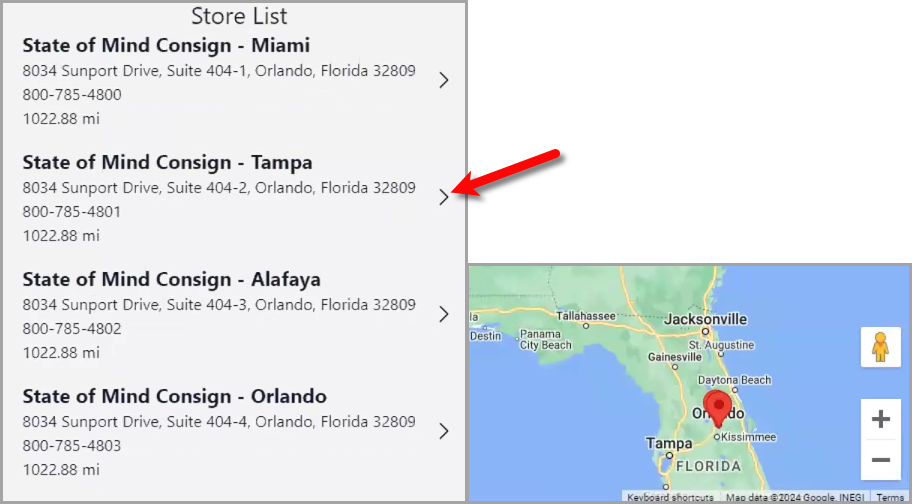
- Select the Store you wish to associate your email with.
You can also use the map on the right hand side to see other stores in the area.
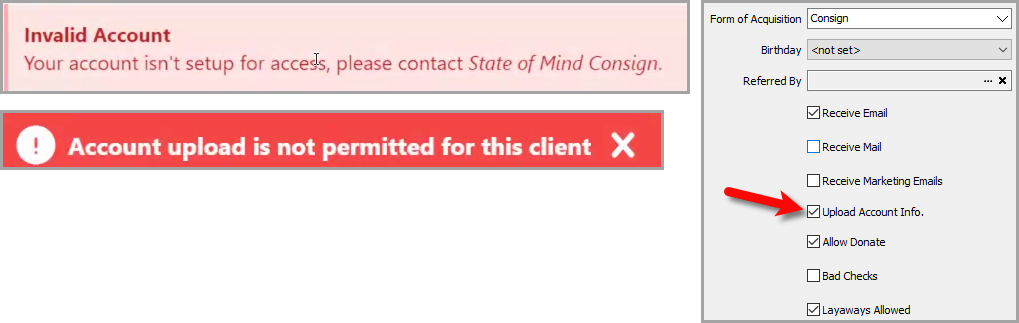
- If you receive an Invalid Account error, this means that the consignor account does not have Upload Account Info. checkmarked.
If you are the store, go ahead and open the Inventory Module, open the Account of the person attempting to login, checkmark Upload Account Info edit account pane and finally click the Save button.
They should be able to refresh the page and login.
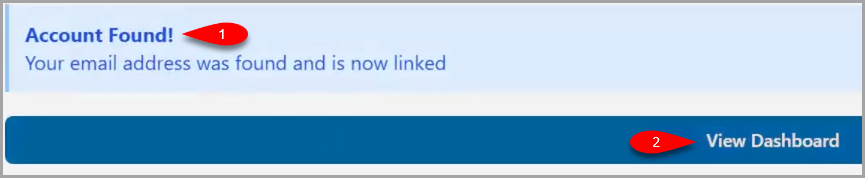
- You will get an Account Found! prompt if everything was successful, click the View Dashboard button when finished.
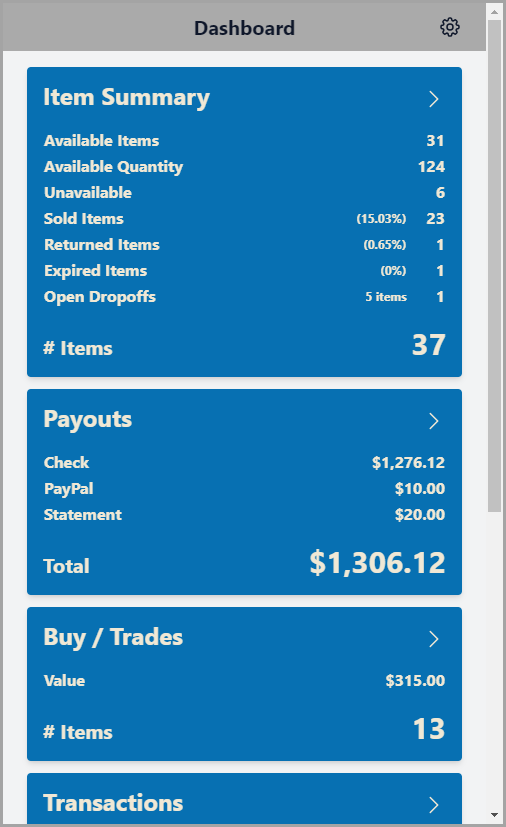
- You are now signed into your Consignor Center dashboard!


Add A Store
It is possible to add more stores to your personal Consignor Center account. This process will attempt to match your linked emails along with your primary email to an account at an additional store you would like to add.
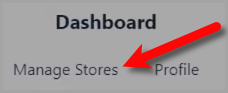
- Click on Manage Stores at the top of your Dashboard.
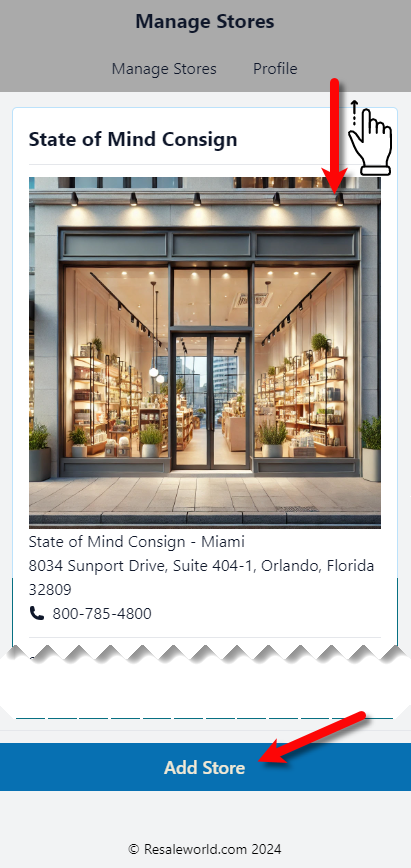
- Scroll down all the way down and click the Add Store button.
- You can now repeat the process you did at the beginning when you added your first store and select it to add it to your list of Managed Stores.


Manage / Swap Stores
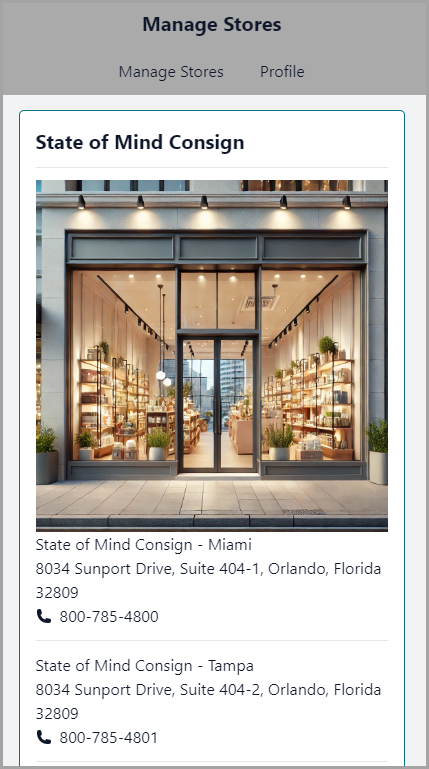
Once you have added more than one store on Consignor Center you can go to Manage Stores to view another store.
- Click on Manage Stores at the top of your Dashboard.
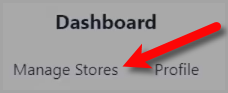
- Scroll down through the list of stores your email is associated with on Consignor Center and click the store you want to view.
Linking Another Email To Consignor Center
You may be using more than one email across different consignment stores.
Consignor Center provides the ability to add more than one email so that when you Add A Store, it will look through your linked emails and match one with the store.
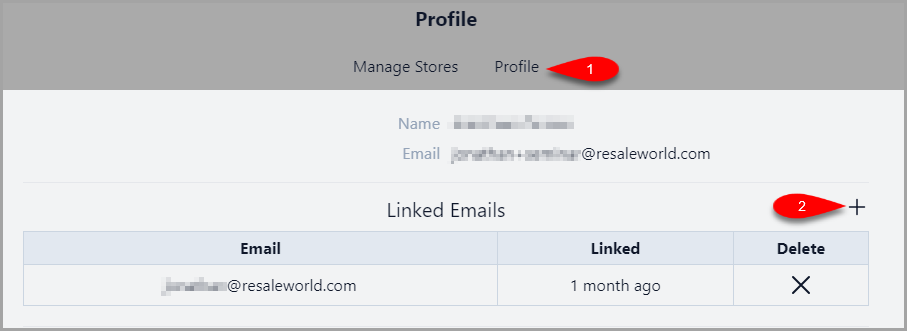
Note: Each store can only support one email address per consignor. It is possible to use different email addresses across multiple stores, but you can only have one email address linked to a consignment account per store. - Click the Profile button.
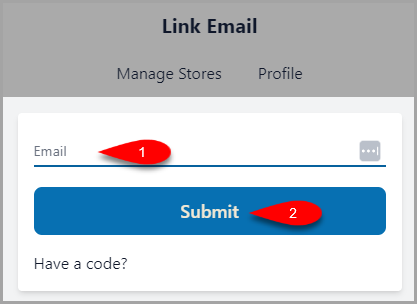
- Type another Email you would like to link to your Consignor Center account and then click the Submit button.


Deleting A Linked Email From Consignor Center
If there is a linked email you no longer wish to use with Consignor Center, you can delete it.
Note: The primary email address you used to sign up with Consignor Center cannot be deleted. Any stores linked to this deleted email will also be unlinked from your Consignor Center account
- Click the Profile button
- Find the Linked Email you wish to delete off of Consignor Center and then click the Delete button.

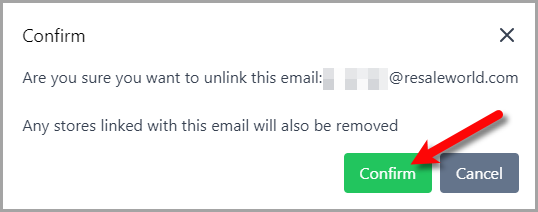
- You can now click the Confirm button and the linked email will be deleted from Consignor Center.


Logging Out Of Connected Devices
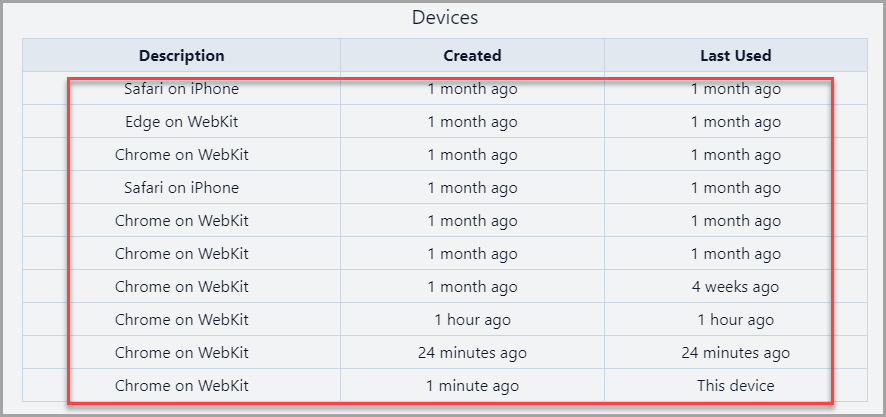
You can log out of all devices that went through the verification process on Consignor Center if you notice a device you do not recognize in the list.
- Click the Profile button
- Look through the list of devices that were used with your account on Consignor Center.
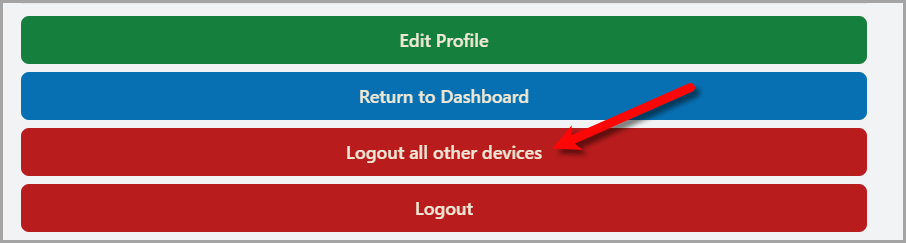
- Scroll down and click the Logout all other devices button. This will force anyone logged into your Consignor Center account to go through the verification process again before they can get into your account.


Changing Your Profile Name
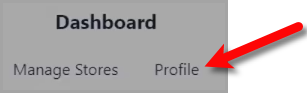
- Click the Profile button.
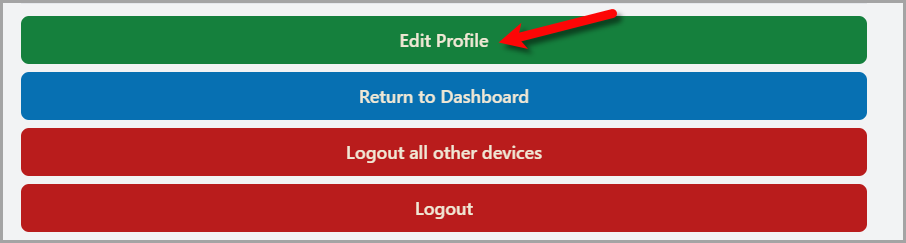
- Click the Edit Profile button.
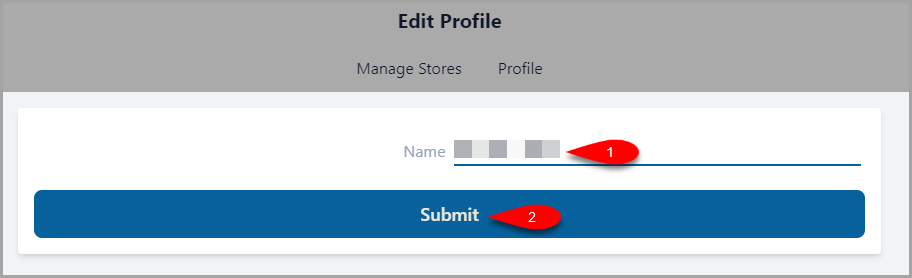
- Type in the Name you wish to associate with your profile and then click the Submit button.


Next Article In Section
Click the following link to move to the next article in this section:
Liberty API Setup
Related Topics
Consignor Center Store Setup Overview Configuring The Consignor Center Dashboard Area Configuring The Consignor Center Details Area Consignor Center Dashboard View Liberty API Setup Adding Your Consignment Store Deleting A Linked Email From Consignor Center Consignor Center First Time Login Instructions Linking Another Email To Consignor Center Logging Out Of Connected Devices Managing / Swapping More Than One Consignment Store